Thursday, October 31, 2013

Half-Assed DIY

Sometimes, I make shit so I don't have to buy it. And YOU CAN TOO.


I will admit I have a bit of a problem with being crafty. I have a pinterest account where I commit far too much time to pinning DIY stuff. Occasionally I'll go out and get crafty. I will admit it can sometimes get expensive.

I don't know if I mentioned it in the procrastination Sailor Dress post,  but I'm warming to the idea of adding more rockabilly and retro clothes into my wardrobe. One of the basics I've seen at Bettie Page and other stores are scoop-necked cardigans


Unfortunately, these tend to run expensive at stores, much like most retro-looking clothes, which I find somewhat stupid when it comes to fucking cardigans but whatever. Thankfully Target came to my rescue. I found a bunch of cardigans on sale and had the high neck. I felt they were too plain on their own so I decided to embellish one:

obligatory before

I chose an applique I had saved from a jean skirt I had in seventh grade because that's what I had lying around. Before I threw out the skirt, I cut the embellishment, figuring I'd need 'em one day. 9 years later, I did.

cutting away the denim

After everything was cut away, I hand-stitched the edges of each piece to the collar of the cardigan. I had to chop up the apliqué


BAM. Embellished caradigan

I feel like another blog would make this a DIY with like, step by step instructions on how to customize your cardigan but here on The Stitchin' Bitch, I'll give you the same instructions I followed:

  1. Find cardigan
  2. Find things around the house you want to put on cardigan
  3. put things on cardigan.
TOOOO be fair, DIYs go as far as to tell you how to put the things on your cardigan so here's my guide to putting things on other things:

Fabric applique and other fabric-ey things

If you bought it at a store, chances are, there are instructions to attach your applique on. Usually it's ironing, if you're lazy like me. If you did what I sometimes do and just cut pieces out from old clothes and other fabric pieces, take a needle, take thread, and sort of stitch the pieces down however you see fit. Either in and out uhm... running stitch(?) or whip-stitch... it might be better to whip or invisible hand stitch. If you google it, you'll find plenty of ways to sew things down. This method also works for buttons and beading.


Studs and bedazzley things

If you're like me and can never find your (mom's) bedazzler when you need it, never fear: that shit ain't magic. Seriously, there are little pointy studs on the other end of the bedazzling studs that you just poke through fabric and fold over. BAM 90's jacket. You can bend the ends with a pair of pliers or use your nails.

Pretty much everything else

So things like fur trim, rhinestones, and puff paint and feathers... even buttons and studs, can sometimes just be attached with GLUE. I like fabric glue because it's usually designed for that stuff. I'll also use hot glue if I need to. Hot glue is seriously my best friend when it comes to crafts, it's pretty versatile an hides better than duct tape. 

and the come in fun prints.

So for those who needed it: there you go, If you're determined, you too can stick stuff to other stuff and make it look like you spent $150 on clothing from Anthropologie. 

Here's a link to my Pinterest with a board, specifically called "If They Ask, You Got it at Anthropologie" it's got a lot of other DIY projects including a LOT of cutout tees.

Here, I attached it to a unicorn for you.

Next time (potentially:) The next big project.

Tuesday, October 29, 2013

The Gold Belle Gown

Quick Overview

Materials
Total time: Around 1 month. I took long breaks
Drinks: Crabbies alcoholic gingerale, lots of hot chocolate
Noise: Smallville, House of Hades by Rick Riordan- for the skirt, Beauty and the Beast Musical soundtrack.

Overall, this was an interesting learning experience. I've never made something that I hadn't really designed myself. I'd always wanted to make a cosplay and Belle was as good as anywhere to start. I ended up wearing it to a halloween party with some of my good friends who were also Disney princesses. The process kind of sucked at times and I didn't quite get around to finishing a few seams. All around, the dress looks great from far away and is a bit messier close-up. 


The texture difference between the bodice and the skirt is perfect. I can't understand why anyone wouldn't use a light/sheer material for the shoulders either. The gloves were sort of difficult to eat/drink with but in the end I still managed to get by. I owe so many thank-yous to my fairy god siblings who helped me through the process, in particular, Beth (dressed as Aurora, here) who I consulted probably every 10-20 minutes as I was working.

Putting on the dress for the first time was a bit of an experience in of itself. Whenever I'd dress up before I'd never really had a sense feeling like a princess, whether I was in a faire costume as nobility or even in my other halloween costumes as a kid. I think between having the control to indulge in my cosplay OCD as well as having undertaken the entire process myself, really helped. I really felt like a princess in this gown. I felt pretty and for a moment I felt a bit like I could have stolen the dress from the movie. Which is exactly what I wanted. In the end, this costume's filled me with a strange sense of pride and I'm glad my first cosplay was this.
I said it once, I'll say it again, these guys are the stupid best.


I will admit, I had a moment with one of the FGSes in which I KNEW it was her, I'd seen her process pictures, and she still scared me.

My friends are cooler than yours.


It had to be done. The original in case you've been living under a rock
Thanks to Mark, Beth and Kerianne for the photos!

Next time: something light

Happy Halloween, everyone-

The Stitchin' Bitch <3

New and a Bit Alarming (a.k.a. Belle part III)

hehe, see what I did there?

The Bodice

Because I'm too busy to make myself a real corset and I'm a busty girl, (hehe, busy and busty) I was having a seriously difficult time deciding on whether I'd be wearing a bra or not. I decided that I would cut and fit the bodice with a bra on and invest in invisible straps. The bodice would still be  As I planned the piece, I realized I'd need to ensure that the body would have enough support to hold everything *ahem* in.
two layers of canvas

I had a lot of spare canvas left and while you can't tell, there was some silk left but I'm afraid it won't be enough for the draping around the skirt. We'll find out.

Canvas structure and silk fashion fabric, waiting to be sewn. 
And there you have it, two layers of structure and one layer of fashion

I'm really loving how the gold is photographing. I think it was a good balance between yellow and gold. Also I cut the dupioni so that the shlubs ran vertically. This was simply out of habit as years of personal hang-ups have sort of scared me a way from small horizontal lines.

With everything cut, it's time for construction:

About Boning...

My corset creation history is somewhat shallow: I've made two Elizabethans of my own and a FGS made me a Victorian she has blocked from her memory. In the pheasant dress as well as in my corsets, I've used heavy-duty plastic zip-ties I purchased from Home Depot and then cut and shortened painstakingly with wire cutters as boning. I've worn corsets with spiral steel and white steel boning as well but they've met unfortunate ends... or never started. Recently a FGS suggested trying to use lumber ties (the things they use to hold lumber together at Home Depot.) They're wider than zip ties, they're stiffer and also THEY'RE FREE.


Soooo I made my way to Home Depot where supposedly I could pick these things up from the ground. Just my luck, they'd already swept up. I was informed if I wanted lumber ties, I'd have to fish for them.

The world is your oyster.
Naturally the lumber tie I wanted was buried deep in the crevasses of the trash bin so naturally I dove in to pull it out. I probably shouldn't have been holding my cell phone at the time as it dropped into the bin and I had to really get in there to fish it out.

That was around the time I got stuck.

I was helped out by the nice lady who pointed me out to the can in the first place. I then had to explain to her why I needed lumber ties in the first place. Thankfully I left Home Depot with more than enough lumber ties for a few projects... although, with a little less dignity.
that's one tie.  I got 3 of them
I used yellow grosgrain ribbon as the channels for my corset rather than mathing-out the corset channels myself and I don't think I'm every going back. The ribbons and I'm assuming bias tape were a great way to figure out where the channels were going visually and frankly, I like the look. When I work on my next corset I'm going to see if I can do this again.
Bones, cut to size and rounded at the edges (surprisingly easy)


I applied boning to the back seams of the bodice, along the side seams and short ones along the darts at the front of the bodice. I'm not sure how the dart boning is going to work out, but I"m willing to give it a shot. If it doesn't work out, I can always remove them. I'm considering adding one more bone on the side but I can't imagine it'll help much.

I then laid the two layers of canvas over each other, stitched them- right-sides-in, then sewed the channels directly through both layers... essentially treating the canvas layer as one layer... Then it came time to sew the silk to the bodice and I'd realized I'd made a mistake somewhere...

I couldn't flip the thing inside out again because the channels tacked the canvas layers together so I cried a bit, and then consulted an FGS who advised that I rip the neck and back seams and fold the hems in to stitch them down. (drink for fucking up)

Once all the layers were sewn down, I topstitched the bottom of the bodice, and hand couched the lacing holes in back.

Also featuring the grosgrain ribbon channel. SOOOO USEFUL.

And then the skirt:

As previously stated, I had a math goblin working on my skirt which started as a full-on circle skirt pattern. Later I had the math goblin change the design again to make a gored skirt with pleating. Then the pleated skirt pattern looked... bad. Finally I brought the whole project home to my parents' place where the Mom unit gave the project one glance and said, "ruche it."

Sometimes the simplest solution is the easiest.

for a forty inch long skirt panel, I doubled the length and cut eight panels.


the mockup. it was long, I felt like a fisherman with an overly large catch.


The mockup went well and looked like what I wanted. I was both relieved and annoyed I didn't decide on it sooner. I ran gathering threads along the sides of each panel, and shortened them to 40 inches.


the relief I felt after each panel was finished was somewhat absurd


It's always really cool when your work starts to look like the thing you designed.

The final step was tacking on the trim around the middle of the skirt and the shoulders. It was easy enough hand-work and in the end I actually had more dupioni than I thought. (Celebratory drink for having just enough fabric for the whole thing!)

Next time: the final product.


Thursday, October 24, 2013

Procrastination

Soooo... I got sidetracked...


Apparently I was working on a ballgown or something. Yeah, nothing inspires me to work on homework/clean/draw/art/ANYTHING like having a project I'm supposed to be working on. (Take a drink for procrastination!)

Or I could, y'know MAKE A NEW DRESS

So a while back a friend sent me a picture of this dress:
In The Navy Dress

In real life, this dress is about knee length which means on me, it's about 3 inches shy of the top of my knee because I have stupid long legs (awesome) and frustrating big boobs (not-some) which sort of drags the hemline of anything up a few inches. It's also made of this shiny poly material... it doesn't look very nice. the material is a little too light for my taste.

I have a soft spot in my heart for vintage-inspired clothing and a softer one for nautical everything. 40's inspired clothing is, in particular one of those things that just look great on almost all body types. (Unlike 20's clothing.... but that's another post) Up in SF we have a store on Haight called Bettie Page which has a great variety of styles and sizes that go from XS to XXXL. Unfortunately they can get kind of pricey.

the Bettie Page version.


In fact, a lot of great clothing in this style can get pricey. Thankfully I learned how to sew and have been able to trick myself into thinking that the time and effort and material costs that go into making my own version of a navy-inspired dress.

The dress


I started with a pattern that was close enough to the design that I could easily adapt it. Mostly I was looking for those little... chest flaps? The detail on the bodice. (I don't know what it was called so if someone could let me know, that would be great.)

Simplicity 2176 
You can't really see it from here but the detailing in the plaid dress is exactly what I was looking for. I planned on altering the skirt to make a wider hem around the bottom. I found a great navy blue cotton linen at Joanne that has a kind of coarse woven texture that's sort of thick (and was on sale.) I will always pick the natural fiber or the heavier fabric if available.

For the skirt I used as circle skirt generator and then when I didn't have enough fabric... I fudged the math. I must have done something wrong because with 3 panels rather than the 4 I planned, it still fit.

From there it was pretty simple:

Cut


Hem and stitch


Flaunt. (that is my favorite red hoodie at the moment)


Add detail to the straps


Flaunt again


Add more detail

I'm not done yet adding the white grosgrain ribbon but it's a start. I'm planning two white stripes at the bottom and maybe three decorative buttons on the bodice. Jury's still out on the second thin ribbon on the boob-flaps (that's what I'm calling them until someone tells me otherwise.)

As it's gotten colder, I'm kind of wishing I'd found a sleeved version or something since I won't be able to wear this until it gets warmer or I get a cardigan for it. It spins real nice though.

Next time: A belle update.

Tuesday, October 22, 2013

This isn't a post

This is a mini update.

The dress will be finished this weekend whether I like it or not.

School has gotten in the way of a lot of things but I promise, things are coming.

I had to re-do the pattern for the skirt because the pleating didn't look right without enough tension so instead of a circle skirt, I'm going with a gored skirt with a bottom circumference of 5 yards with the waist remaining at 36 inches. Thanks to the math goblin for figuring that out for me.

In the meantime, here's sort of what I've been up to recently.


yeah, I kind of look like the grudge when I'm not photographed properly. If you can't tell, that's a petticoat in the background. Also, that is a pikachu Onsie. San Francisco is cold now.

Take a drink because this is a filler post.

Next time: a real update

Monday, October 14, 2013

One Week (a.k.a Belle part II)

When we last left our heroine, she had gathered her materials and was ready to start sewing...

The Mockup Stage


Friends, let me be frank: I am an ill-prepared person.

I was that kid in class who could never find her pens when she needed them and who still prints her papers out at the school library because I forgot to bring my printer up from my parents place in SoCal. So naturally when it comes to things like owning a dress form... I'm also lacking. So all fitting is getting done by FGS (fairy god siblings) and yours truly as best she can.

Alright, lets do this


The Truly Victorian patterns came in quickly and I still had white muslin left over from planning to make a new faire chemise (Take a shot for a project I started but never finished) so the mockup started. The nice thing about Truly Victorian patterns is that they take into account that people are both funny-sized and most likely going to change in proportion. That said, I have this remarkable ability to squish in a corset so I'm always very suspicious about fitting. The Truly Victorian pattern asks you to measure around and your front and then measures your back and adjusts the front and back based on that. So- as the saying goes- I measured twice, and cut once.

The mockup was too large. Which is fine, that's why we make mockups. It was then taken to a FGS for a fitting. We wound up removing a SIGNIFICANT amount of fabric from the front and back of the bodice as well as adding multiple darts.

The blue lines were the new seams we seriously took like, 6 inches in. 

Checking out the re-fitted bodice with my petticoat.
If the bodice looks awkward in the picture, it's the lack of boning. I'm praying it looks better with the boning in and I won't have to wear a bra with the thing.

So once the bodice was finished, I moved onto the skirt portion.

Based on the Truly Victorian skirt pattern I had determined to use 2 inch horizontal pleats for each panel with two inches in between each pleat. I accidentally cut the first panel too short so once pleated it was about 36 inches long instead of the 40 I needed at the ends. Unfortunately in the middle it was still almost 56 inches. Also, when I finished the pleating it looked like this:


Naturally there were tears. (take a shot.)

I ran to the main consulting FGS who asked if I knew it was that terrible (after all, it could look nicer once on the petticoat...)

If you can't tell by the expression, I wasn't happy.
So not too bad, the edges of the panel are too short which is REALLY annoying and I'm severely hoping it's just because of the fabric but that's sort of... okay... right? RIGHT?! I'm probably going to space the bottom pleats a little more to add some more length and make the bottom a little less even. It'll take some experimentation.

Either way, now I have a week so I'm going to go ahead on the bodice tomorrow and fix the old skirt mockup.

Wish me luck.

Saturday, October 12, 2013

Halloween (a.k.a. Belle part 1)

I'm going to start this post like a Family Guy episode: a seemingly random tangent that leads up to something. I promise. (just in case, take a shot. I do this a lot.)

I've been going to the Renaissance Faire since I was in 3rd grade and even though I had no idea what it entailed, I was hell bent on working there one day, somehow. I got my opportunity 3 years ago as a sophomore in college. My close friend at the time knew someone who worked there with the Guild of Saint Cuthberts (acting groups are divided into guilds at the faires I work with.) I bounced from Cuthberts to English Court but this third year, I think I found a good fit with Serenata and it's sibling group, Commedia Volante: a singing and acting group I remember from years as a faire patron.

Seriously though, these guys are the stupid best.

Within Commedia and through faire, I've found a kind of seamstress support system. So many faire people sew- primarily because you just can't buy these historically accurate costumes. There are so many people who I can now call my friends whom I can go to when I have a sewing question, a design question or just generally want conformation that "no, that's not a stupid idea, you can totally sew red hearts onto your bloomers." Any mention of "Fairy God-Sisters" comes mostly from faire as many of them are helpful, beautiful, nerdy, snarky, disney fanatics and have come to my aid more in the last few months than I've ever needed from my fellow man. I partially blame this safety blanket for my current poor decision-making.

Something also important about the Fairy God-Family is that they encourage Halloween. OH HOW THEY ENCOURAGE HALLOWEEN and because I'm a college student, naturally there are multiple costumed events I am required to be at. Of course, on this new sewing/costuming kick, of course I decided to take on multiple costumes!

That's sweet Clara, but get to the point


Still basking in the afterglow of the Pheasant dress, with a costume ball event looming AND fueled by the DP dreams of mia famiglia- DP stands for Disney Princess, get your mind out of the gutter- I decided that it was high time I did my own Disney princess costume.
in case you didn't look at the title of the post
I'm a dark-haired girl with brown eyes. I was a voracious reader as a kid who didn't really like running around but always wanted adventure. I also happened to have a copy of Beauty and the Beast on VHS that I watched the shit out of. Seriously, it broke, I watched it so much. While I can't say that I liked her out of anything other than the pure narcissism of the fact that she had brown hair, I'm not going to say she didn't make a little impression on me. I am of the ilk who believes that cosplaying should be done to the cosplayer's strengths and so I was hesitant to try my hand at this sort of recreation. Disney princesses have come under a lot of fire based on the purported ideals of their stories and the ideals that their basic appearances supposedly force on young women.

Buuuut that's not what this blog is supposed to be about. I'll save that rant for a different time.

Back to Belle.

So I started a little research. And by research I mean, I watched the movie a few times and looked at other people's attempts at the dress. BEFORE people start rubbing their fingers at me in a "shame on you" motion (admit it, you just tried it now that I've mentioned it) I am not looking to make a historical recreation. The essential idea to this dress was to bring the original dress, from the movie, to life.
Little girl's dream. Right there.

The Pattern

So the first thing I did was hit up the Fairy God-Sister Council. If you guys are reading this, don't laugh, that's what you guys are in my head. I'd been combing Simplicity, McCall's and Burda looking for princess patterns, particularly for parallel pleats. (take a shot for the alliteration.) Did you know there are practically zero commercial Belle gold-dress patterns? I sure as hell didn't realize this until about two weeks ago. The Fairy God-Sisters sent me to Truly Victorian and more specifically a seperate bodice and a skirt
TV240

TV416

Obviously we're not looking at exact matches but these patterns are alterable and that's what I was looking for. I primarily purchased the bodice pattern because without the sleeves, it does bear a striking resemblance to Belle's bodice, especially if one eliminates the buttons down the front and the pleating in back (which I did) as well as ignoring the sleeves altogether (which I was also happy to do because less work, woo!) The skirt I purchased mainly because of the horizontal pleating on that top layer. It also had gores which is another essential part of Belle's dress but I mainly wanted the be assured of the pleating technique and how long the original panels would be in comparison to the finished piece. I also purchased the bodice with the intention of treating the piece like a corset. The cartoon dress does not have any obvious closures other than a seam in the front which I highly doubt is actually supposed to be anything other than a guide for the animators. I am also a busty gal and had to wrestle with the idea of purchasing a strapless or invisible strap bra to wear with the dress or somehow finding/whipping together a corset in the short amount of time this dress was going to be needed. In the end, it was suggested that I bone the fuck out of a canvas bodice (yes, that is the technical term) covering the thing in a fashion fabric and lacing it in back.

Ahh but then, what did I use for the skirt pattern? Well, I'm glad you asked because I am both proud and frustrated with my stupid-ass decision making. And my hubris.

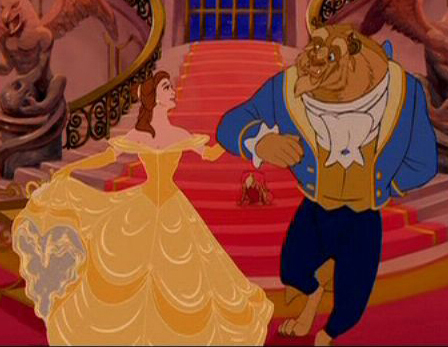
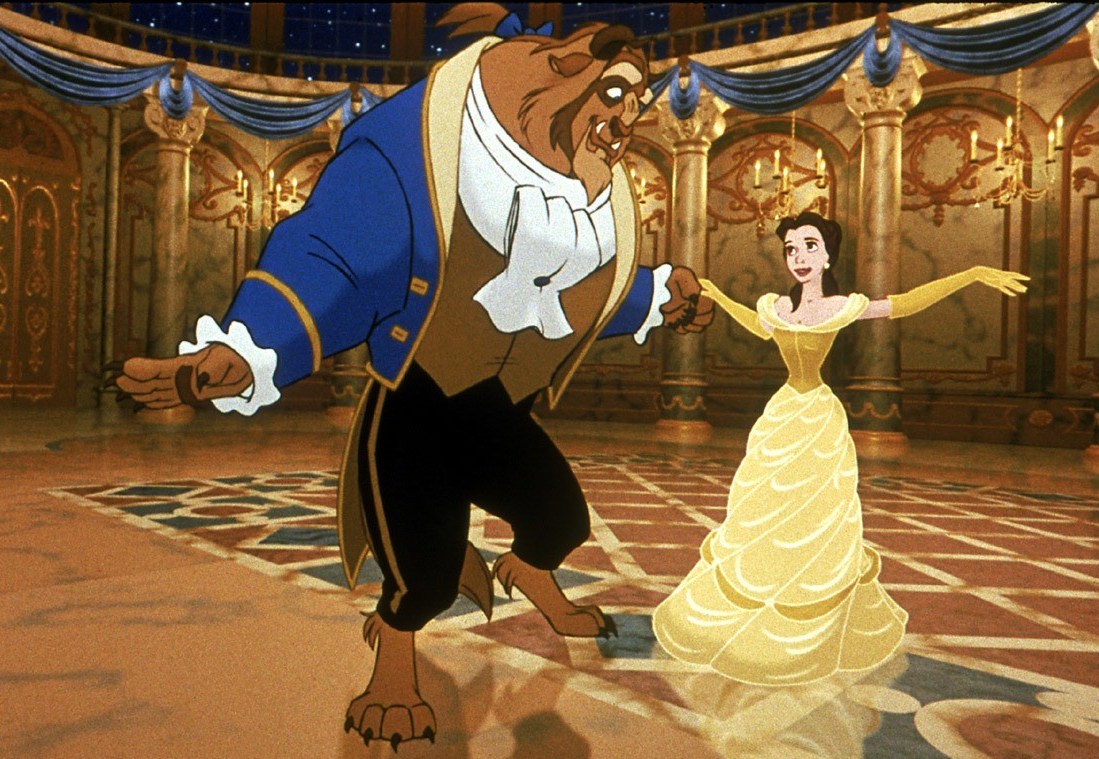
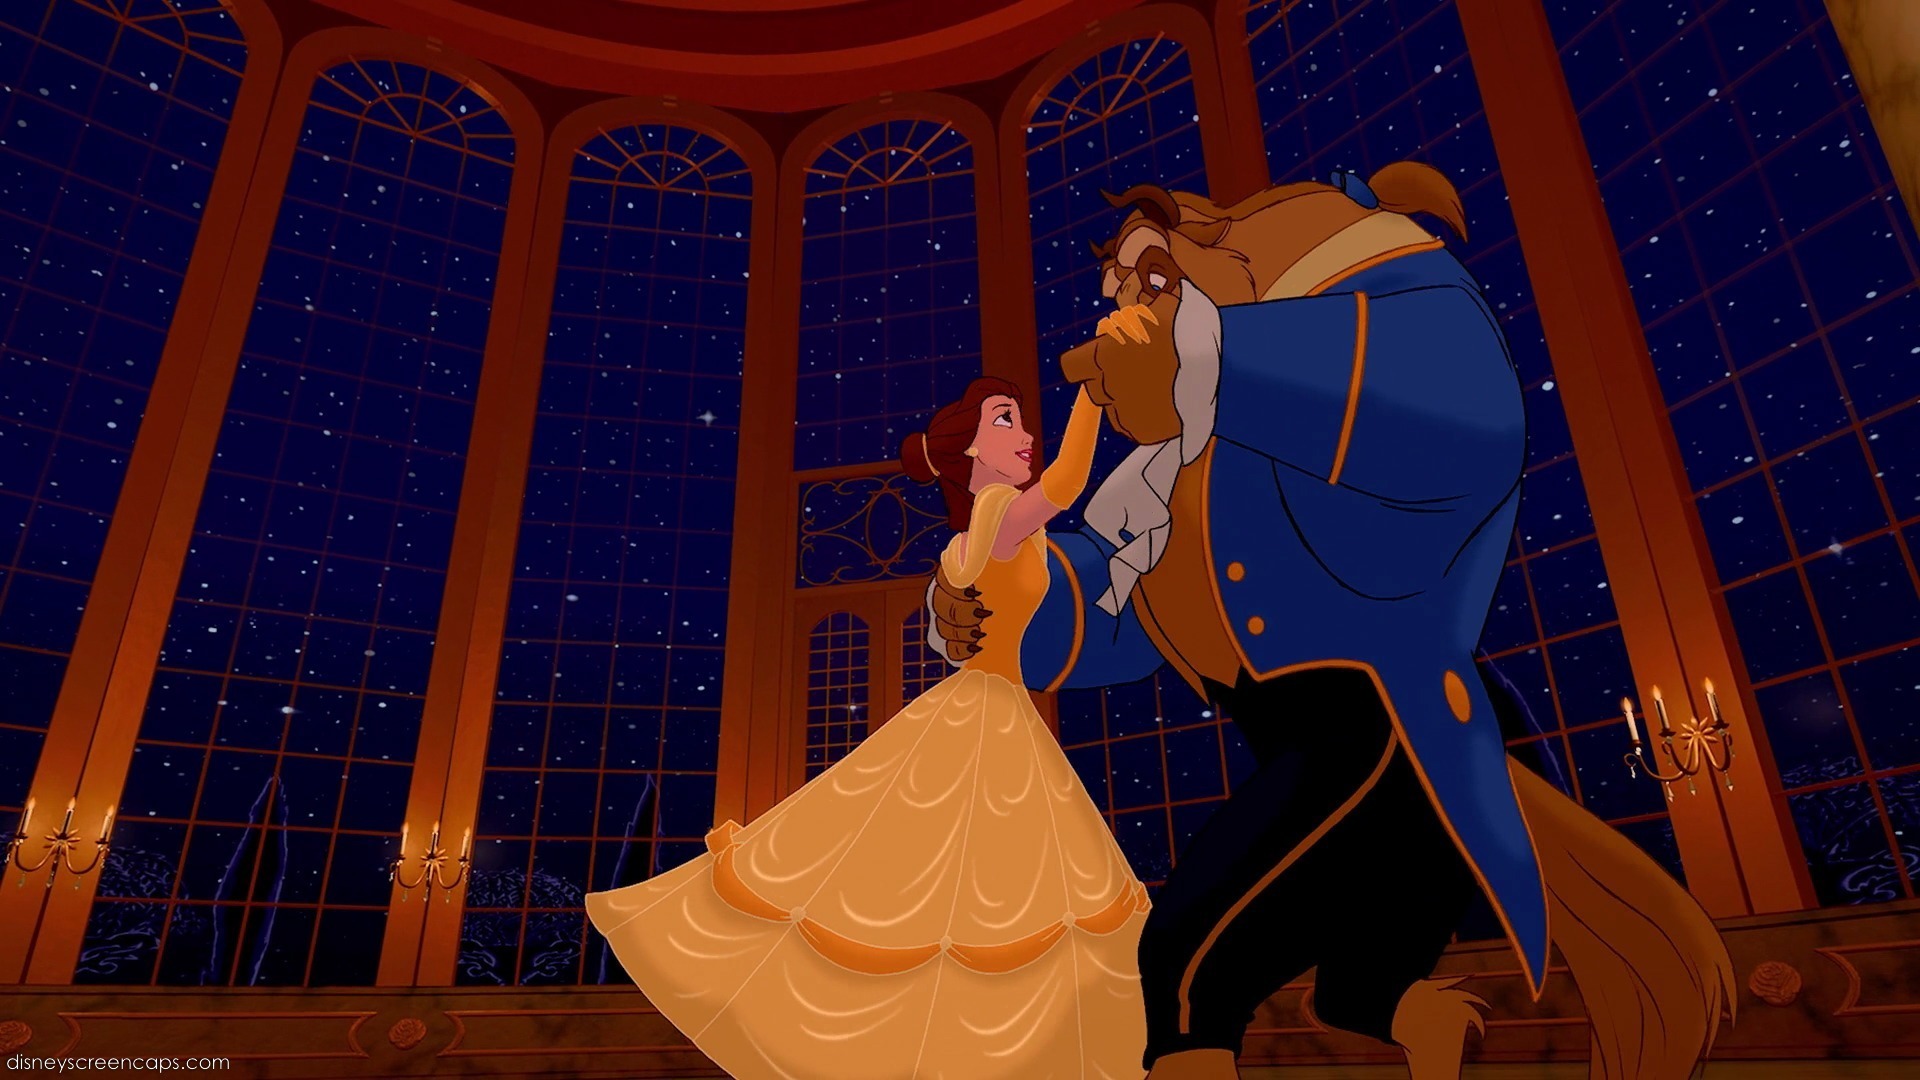
I couldn't shake the idea that Belle's dress was not actually a bell-shaped skirt, no matter how much I wanted it to be. I've made bell-skirts before, the Pheasant dress's underskirt is one. So to get a better idea of what the skirt pattern might be, I turned to that famous scene from the movie:
Seriously though, formatting these pictures is a bitch.


Sometimes I want to go back and time and strangle the animators. Mostly because, yes, that could have been a bell-skirt if, when she curtsied, it retained that shape, somewhat. Instead it fans, it swirls and it floofs (take notes, this is professional-ass lingo here.) While I could have gotten away with maybe a 8-10 yard straight paneled skirt, my insanity would not be satisfied until I settled on a gored, circle skirt pattern.

For this, I turned to an engineer.

Okay I turned to an engineer-in-training. What is college life if not for networking? A few painful and drawn out and easily distracted video chats later and I had a gored circle skirt pattern that was long enough to pleat into two inch pleats all the way down.

there was a bird break


Look at 'em gores.
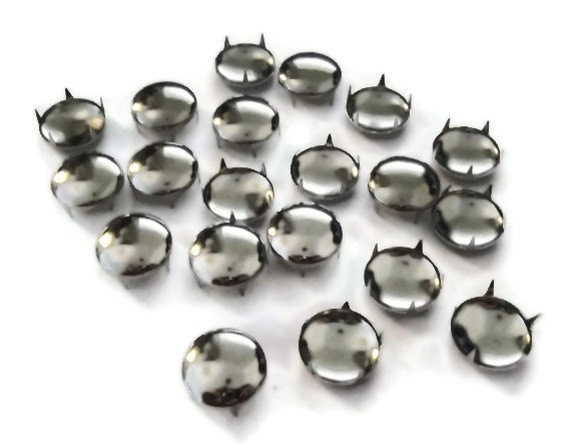
Soooo with hardware taken care of it was time to get the rest of the software.

Material Concerns

Remember that part I added in my "about me" first post where I said I was a college student? Yeah, sometimes that comes with a few strings attached. I will not deny that I am incredibly blessed and lucky to have a family that has been able to provide for me while I am in school and I am reminded every day of how lucky I am to have them. I do occasionally take odd jobs and commissions to pad out extra spending money and I do keep a budget to keep from overspending. All this said, that did not keep me from balking when I started looking at the material costs for this dress.

Of course my first instinct was to use silk dupioni for this. About 75% of the time if you ask me what a dress should be made of, I'll tell you to use silk dupioni. I do this for a few reasons: 1. it's generally a cheaper silk than say, taffeta. 2. I find it in more colors than taffeta and 3. I play an Italian at faire and we're all about silk and 4. I LOVE TEXTURED FABRICS. With silk dupioni in particular it is a fast and easy way to bring a cartoony color like yellow/gold and turn it into something that could be believable and tangible. With satin or taffeta I always worry about the costume looking too... costumey. The imperfections in dupioni somehow comfort me into thinking that this could be a real dress, worn by some princess long ago.

I understand many dresses women wore were made of taffeta and velvet and moire etc etc. this is just my brain doing it's thing.

Because I am a lazy butt who is now at school up north, I went to my current favorite silk provider: Silk Baron. They ship in a timely fashion and they allow you to order swatches with free shipping and also provide you with 3 additional swatches when you purchase yardage. Sometimes, when I'm sad, I look at my Silk Baron swatches and smile thinking about all the silk projects waiting to be made. Perhaps one day I'll make a Commedia costume with patches of all the pretty swatch colors.

I wound up selecting dijon dupioni for my bodice color and cumin taffeta for the skirt. And then I looked at how much yardage I would need for the skirt and thought maybe I should look into something somewhat cheaper.

That dear readers, was the first time I cried during this project. (take a shot)

After the initial stress at realizing a silk dress of this nature would be fiscally irresponsible, I was encouraged by a Fairy God-Sister to hoof it down to the discount fabrics store in downtown SF and find myself a new yellow silk. I left that day with 10 yards of gold* silk habotal and 10 yards of un-dyed muslin that is now carpeting my bedroom

yellow canvas, roll of habotal in between and dupioni on the right

I then ran off to Joanne to find yellow canvas duck which I got for 30% off because they were having a sale. I then noticed I had a 50% off entire purchase coupon that I hadn't used and proceeded to get a few things for another side project I will post about next time.

I already have a petticoat I'd purchased for a previous event and I picked up yellow thread. Next time: mockups, boning and perhaps side projects.

*P.S. a note on "gold" versus "yellow"

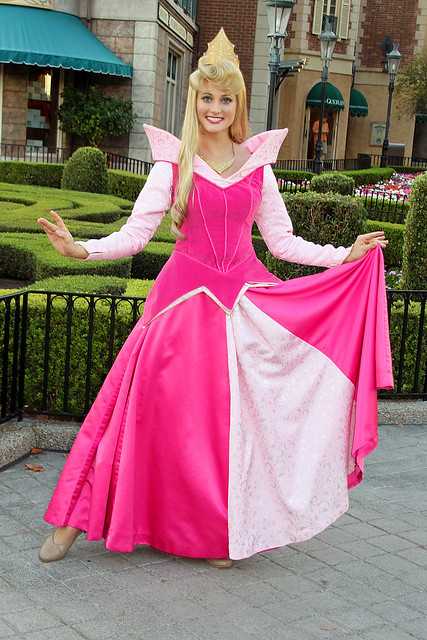
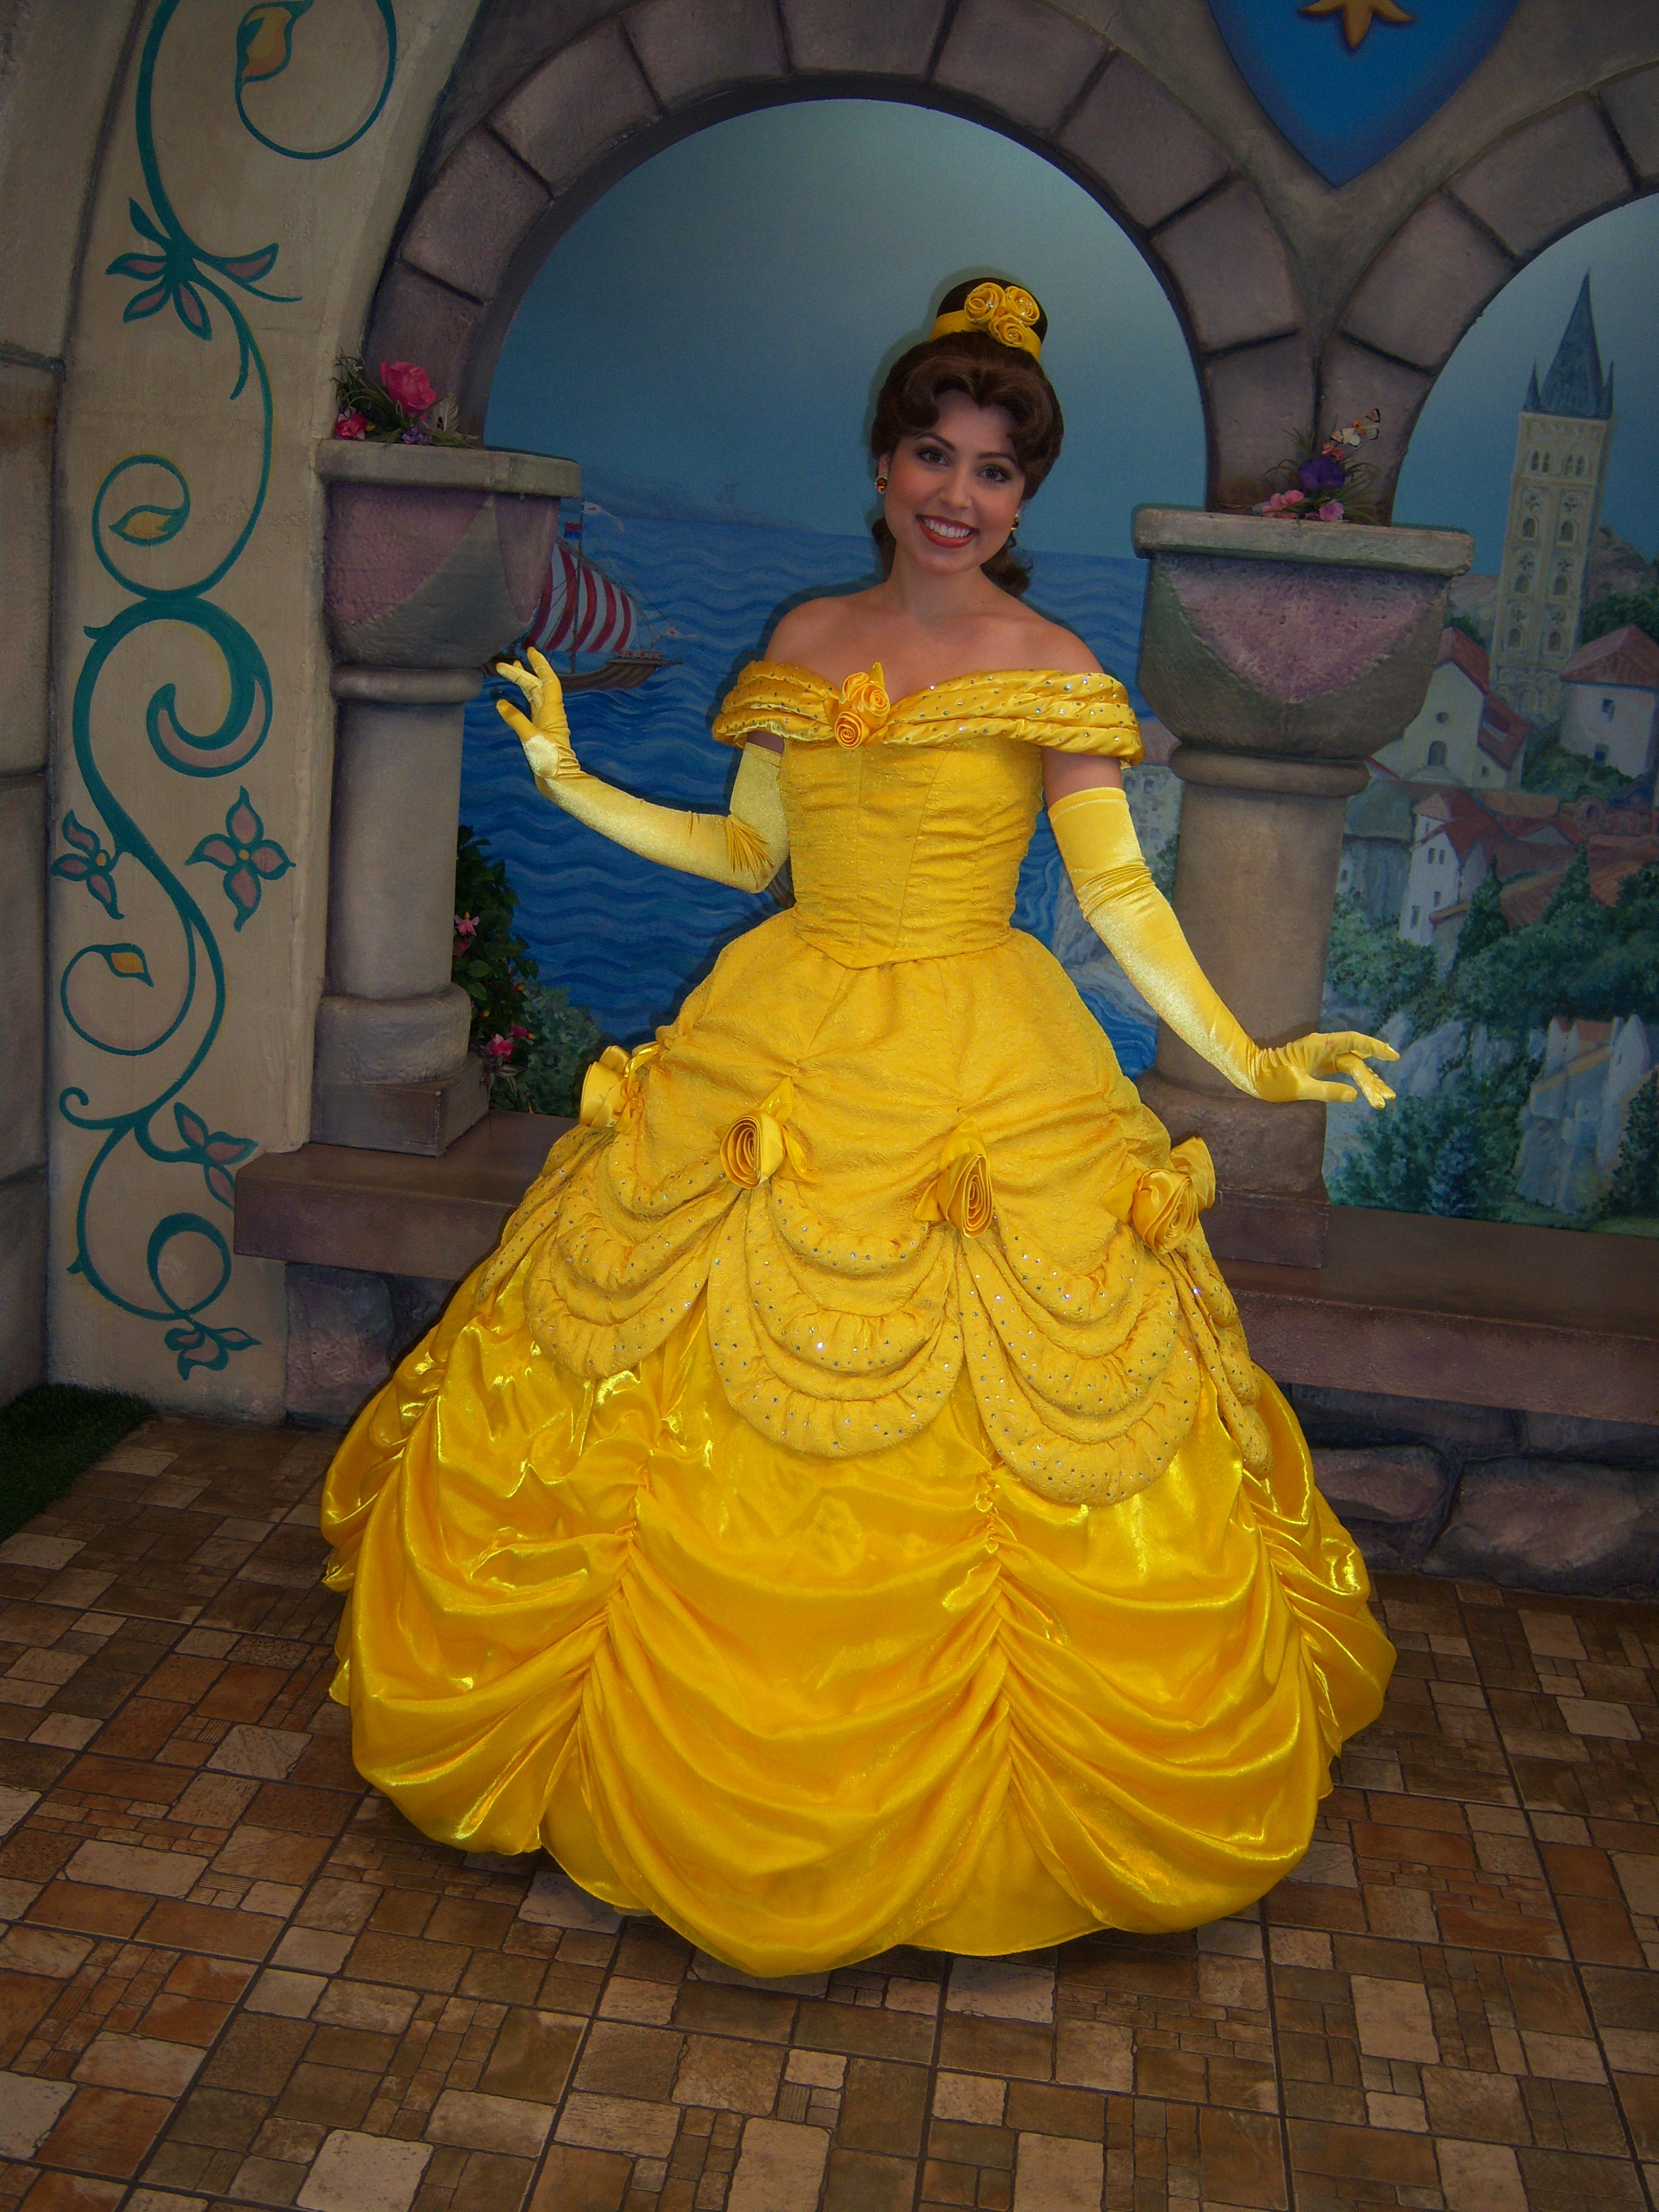
I did debate this with some Fairy God-Sisters. Belle's dress in the movie is never really a consistent shade of yellow due to lighting changes and the fact that it's 2D hand-animated piece. Just as Cinderella's dress is argued to be silver rather than blue, I like to believe that no one in their right mind during the period that dress would have been made and this story took place, would have chosen to make a bright-ass yellow dress. For the same reason Aurora wears pink on all her merchandise and Cindy is inarguably blue, Belle has been regulated to buttercup yellow on backpacks, placemats and sippy cups. Years of merchandising have also started to leech into the park dresses as well and we get hideously bright... things:


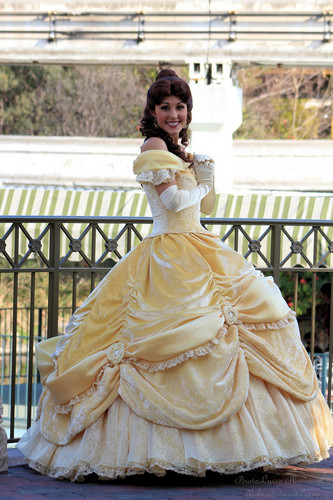
Thankfully the new park dresses have started to go back to their roots but I fully maintain that in the original movie, Belle's dress is a gold-yellow. Which would attribute to the color variations and the shiny glint we get in various scenes. Also, I have gold skin so straight yellow would look terrible on me and in the end, it's me wearing this thing.

I'm amused by the choice to have the straight underskirt. It's very much like my TV pattern.