Monday, April 7, 2014

Speedy Alterations

About a day after Gaskells ended I proceeded to remove all the shiny things off of the Midnight Gown (also known as Pamina) so that I could convert it to a dress for Peer's Gotham event. The whole experience felt rather like being Jack and having to sell your beloved cow in order to feed your family/get on with the next thing. Except if Jack hacked his cow apart and the meat and wore her leather as a shorter, more useful dress.

(I've been watching a lot of the Escapist's Zero Punctuation and it's made me needlessly cynical.)

For the Gotham City Black and White, we were encouraged to go as the colorful citizens of Gotham so naturally, I defaulted to my favorite daughter of Gotham: Helena Bertinelli/Wayne otherwise known as The Huntress. (Btw, on that link you can choose which parentage you want to look up.)

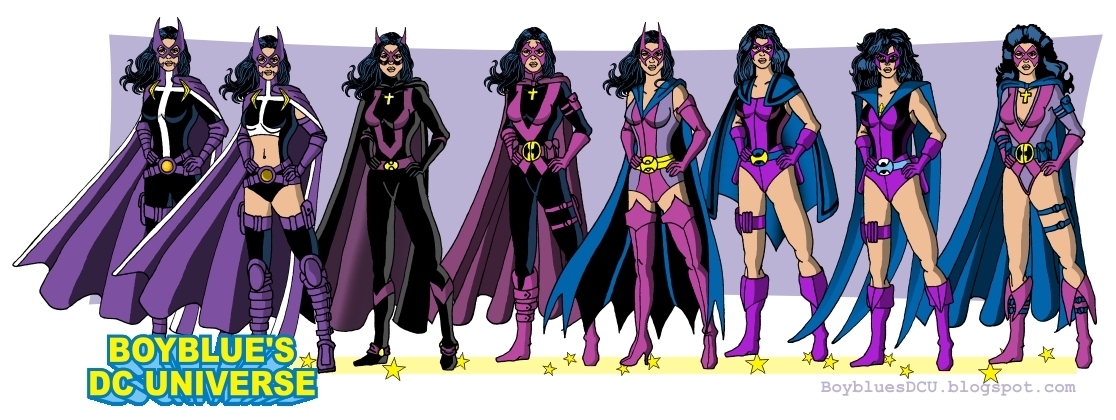
A timeline of her costume sort of reads like a reverse strip-tease.
(This image should be read from right to left)

For those of you who don't know who the Huntress is, she has two different origins, both of which involve her parents dying a la Batman. Sometimes this parent IS Batman (the other one being Selena Kyle) and I find this sort of awkward but it creates an interesting relation to fellow Birds of Prey member Black Canary. (Another super heroine who's parents dumped the mantel on them.) Also, if you are a female who likes the idea of the DC universe and has a high tolerance for the male gaze, check out Gail Simone's run of Birds of Prey. I enjoyed it and you'll probably not see a higher concentration of the big-busted female DC supers in backbreaking positions for a while. (Marvel does bring a cute BoP challenge with one of their current X-Men runs.)

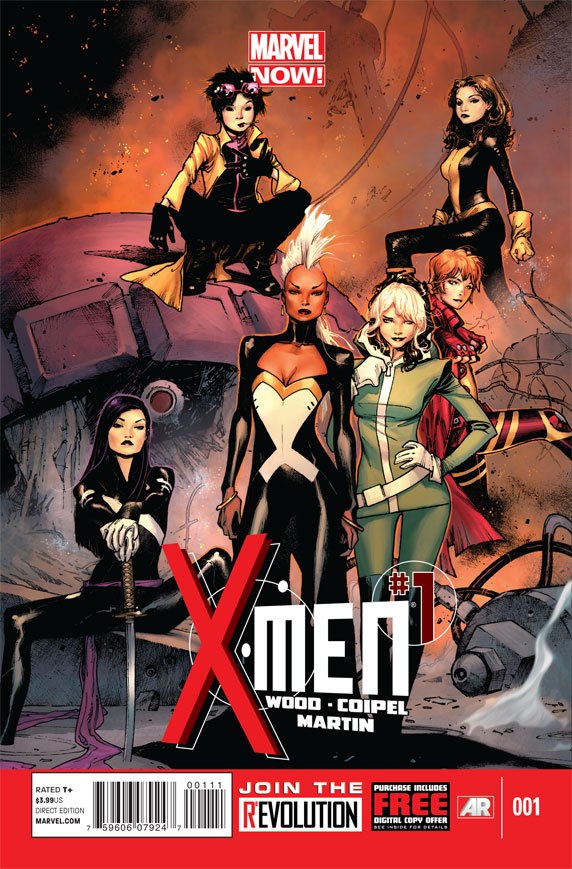
And because this is the current X Men  title is just called
X Men, it is really fucking hard to google.
Also we won't speak of the train wreck that is Huntress in Arrow. Just... no.


I'm not going to get into why I like Helena so much, I just do and so I needed a 30-50's inspired dress that could be made in less than a week and look good (in general, I like to have a weekend of break between sewing engagements so that I can actually do homework and sleep and stuff. It also keeps me from buying so much fabric.)

Diatribe over, time to sew


So the dress design was done pretty quickly and worked out pretty nicely. I incorporated the colors of Huntress' outfit and considered playing off the cross theme a bit too. In the end, I designed a little black dress with a purple sash. The cross motif would be played out in a fascinator and in a necklace.

There were plans for a purple garter, they got scrapped.

Anyway, once the poor midnight dress came apart the next fun step was hacking off the bottom of the dress. I had plans for that fabric. I had a fairy godsister help with the length and chopping and the whole thing got overlocked again because I couldn't be bothered to roll the hem again.

I worry for the things that the Fairy God Sister sees. And I'm NEVER
using that particular petticoat again.

Odd foreshortening but I was colored "entertained" with
my SF in Winter boots underneath the dress.

From there, I cut out all the boning and proceeded with the first bout of dyeing all the royal blue either black or purple. The thing about dyeing poly fabrics is that you have to boil the everloving shit out of it and I just didn't have a pot that big.

but it didn't stop me from trying.
be sure to use protection
So the dress was crammed into a sad little pot that I purchased at Walgreens along with hot water saturated with iDye in Poly Black. (insert rant about putting "i" in front of words to make them seem futuristic.)

I was somewhat confused by the instructions and my own fear to get dye all over my inexplicably white kitchen and so the first time I dyed the dress, I brought the dye to a boil which took 20 minutes, maybe, let it do that for a few minutes, and pulled the fabric out and washed it.

after hand washing, I compared it to a wet un-dyed piece of fabric
I was INSANELY worried the dye didn't take (with good reason.) So as the dress was drying, I ran out and bought more poly dye try again.

Take 2 (and a drink):

So the finished dyed dress was shit. It looked black in some lights and blue in others and was 100% fucking frustrating.


deceptive bitches

Seriously, the fuck?!
Anyway, learning from my mistakes is part of why I made this blog, so I set the pot up and tried again.

EVERYTHING was covered in foil!
tasty


The second round seemed to take muuuuuuch better.

I was surprised (although I probably shouldn't have been) that the poly dye didn't touch the canvas lining of the dress at all. The effect was actually kind of nice and also kind of looked like I had no idea what I was doing when I lined it and accidentally chose the wrong color fabric... which made me sort of sad.


The kitchen-daylight test is the most important test.
A great side effect that I tried to capture here but then didn't work out as well as I thought, was that the silver grommets I used wound up getting a bit of a rainbow-oily look over them which compliments the design of the dress pretty well.
as usual, take a drink and ignore the messy-ass floor.
With the dress finished I took the spare dress material and dyed it all purple, it came out this beautiful rich color that I proceeded not to photograph. I then fashioned a big-ol' bow sash with a snap in the back so I could easily put it on and take it off. I then proceeded to have it fall off repeatedly throughout the night.

I did accidentally make a Rorsharch butterfly out of dye though :P

I didn't get any pictures of the process of the fascinator but I basically cut a circle out of felt, cut a wedge out from the circle and used a fabric stiffener (Stiffy) to form the piece into a very shallow cone. I then just hot glued the additional netting and white grosgrain fabric in a cross shape over the felt.

All hot and sweaty post dancing.
The cross necklace was a charm I found at the craft store that I just attached to a ribbon, also dyed purple in the same mess as the trim.

Overall the project was pretty simple since it was primarily a dye job. I don't know if I'd do it again, mostly because I realized I did all this before I got a nice picture of the the Midnight dress before I destroyed it. I am happy because this is a dress I'm more likely to wear more often and it is pretty great with or without the petticoat. Who doesn't need another little black dress?


Next time: possibly a breakdown on a fantasy faire outfit and how to fail at costuming research. Possibly the beginnings of my new Italian dress.

Saturday, March 8, 2014

Can't Touch This

Lets Talk Panties

When you start making historical costumes, sort of the first thing you wind up doing is having to learn about historical underpants.

in a nutshell
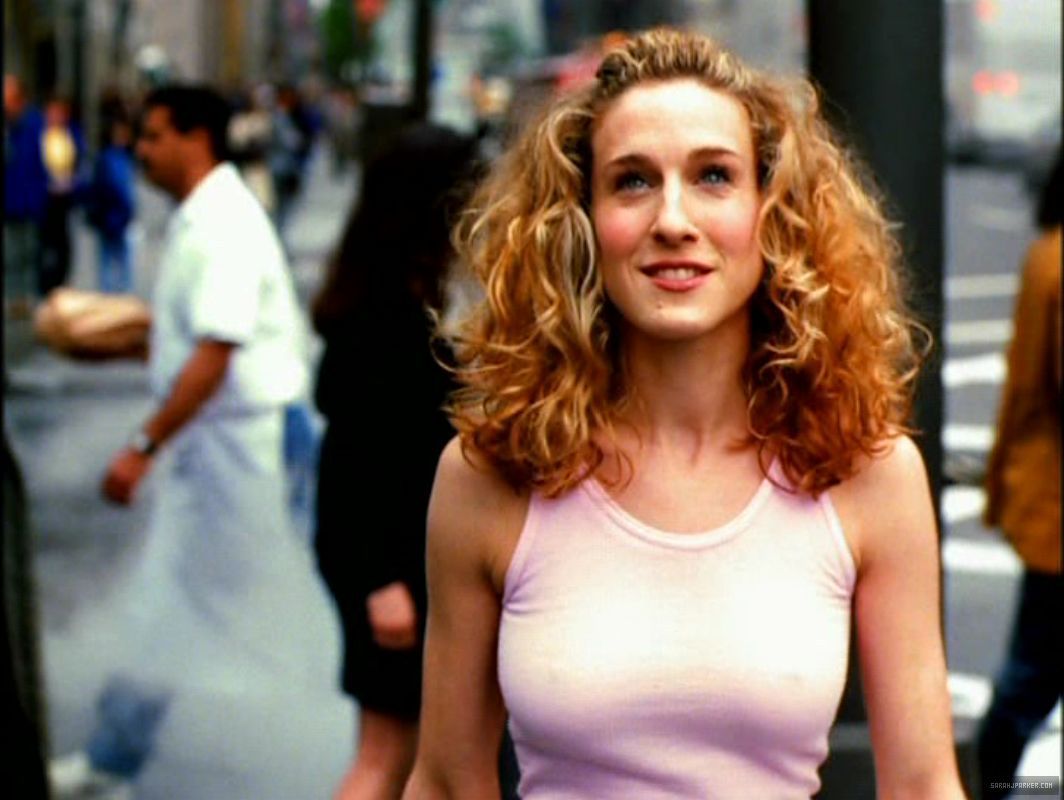
The important thing about underthings is that if you aren't wearing the proper ones, nothing lies properly on top. Just like how sometimes a gal's chest just looks different when she's not wearing a bra under her shirt, she's gonna look weird wearing a bodice without a corset underneath.

I'm looking at you Sarah Jessica Parker. HOW DID YOU GET AWAY WITH IT, DAMNIT?!
This is my subtle plug to DO YOUR RESEARCH. (My peers at school understand how I feel about this) but also, MAKE YOUR UNDERPANTS.

Because we all need to have them under our dresses, every re-enactor costumer and their mother has their way of making bloomers... and usually they're all the same. Look there are only so many ways to make a pair of pajama bottoms. That said, I recently needed to make my own version of... harem pants? something like them genie pants... politically-incorrectly-named-arabian-nights-pants and this seemed like the best way to go.

How to make bloomers/pajama pants/haremish pants/what have you, they're really fucking comfortable


First, you will need:

  • Fabric, I'm about 40 inches from my waist to the floor and I knew I wanted these roomy so I went with about 2 yards of fabric at something like 72" wide. These were for an upcoming costume and possibly clowning or something later so I made mine out of copper striped silk taffeta. I don't recommend silk taffeta for this project.
  • Your sewing machine
  • the appropriate threads
  • Elastic. (mine is 3/4" knit non-roll) I generally prefer non-roll because why not?
  1. Get ready for your endeavor by putting on your favorite comfy pair of pants, you'll be bending around and stuff so you gotta get comfy. Doughnut pattern optional. You can make yourself a drink now if you'd like.
    As usual, take a drink and ignore the mess.
  2. Lay out your fabric (I forgot to take a picture of this)
  3. Realize you don't have a pattern. That's fine, you have your pattern very close to you...
  4. Take off your pants and fold them in half, these are going to be your pattern. What you really need is the curve in the crotch. The curved edge should be pointed out and the straight end will be on the fold.
  5. Mark the curve of the crotch area with a pencil. Mark everything else. The length can be anywhere from your knee to your ankle depending on what you're actually doing. Since these were going to be "harem pants" I ended them at the ankle.
  6. Cut out your pattern twice. You'll wind up with two of this shape:
    Stolen from another DIY for this. You should basically have this shape.
  7. Fire-up your sewing machine and realize you don't have the right thread for this project. Pick out the closest approximation you can.
    Close enough.
  8. Start by hemming the bottom of your pants pieces. You should be making a channel for your elastic band to go around to close the ankle. If you're making pajama bottoms and don't want them closed down there, skip the wide channel and just do a regular rolled hem. Or get yourself a surger. Those things are fucking awesome.
  9. Realize you can't find your fucking snips even though you were using them like, 20 god-damn minutes earlier and you expressly told yourself not to misplace them because you knew you were going to fucking need them in a few minutes. Resort to using your teeth. Then move on to whatever other cutting implement you can find. I suggest nail clippers. Take a drink you Macguyver, you.
    I used sewing shears before resorting to an exact-o knife.
  10. cut your first piece of elastic to the length of your lower calf, or knee or ankle, where you want the end of your pants to rest.
  11. Locate the one safety pin you know you own because you used it to close your cardigan yesterday. Once it's found, resolve to go out and buy more. You'll forget this resolution the next time you get to the fabric store.
  12. attaching the safety pin to one end of the elastic, thread the elastic through your channel making sure not to lose the other end in the channel. If you do, you'll have to pull the elastic out and start over again. Cussing will be involved. Take another drink. As you thread, the fabric should be gathering around the middle of the length of elastic.
  13. Sew the ends of the elastic down at each end of the channel and just save yourself the trouble of trying to do this when you get to sewing the leg together or else you'll repeat step 12 more than you need to. Trust me on this one. I know. This is why there aren't pictures of this step.
  14. Sew the inseam of your pant leg (yes that's what you were working on) up to the curved bit. DO NOT SEW THE CURVED BIT TOGETHER. I used to do this every time I made a pair of bloomers. I still do.
  15. Marvel at the fact that you just made a pant leg and hey it looks like pants! Take pictures of yourself with one pant leg on and realize you can't use them in your blog because you're still technically pantsless and you're not supposed to show up pantsless on the internet. (Unless you choose to in which, more power to ya.)
  16. Repeat steps 8-16 again. Drink twice.
    I stupidly forgot to get pictures of most of these steps so here's something
    I drew earlier...
  17. Dance break. Congratulate yourself on how good of a seamstress you are. Cuss a few times when your bobbin fucks itself over again and threaten to pawn your sewing machine. Take it back when you re-thread it twice and it starts working again.
  18. Flip each leg so that their right side is facing out. This is important because we're gonna sew the crotch.
  19. Sew the curved bits so that they make one BIG smiley face perpendicular to your inseam. The reason you flipped these right-sides out is that for me, anyway, you're sort of coming at it from the waist hole.
  20. Speaking of waist holes, make another channel for the elastic at the waist, leave a little hole for the insertion of elastic.
  21. Cut and thread your elastic again. Have a mild panic attack when you can't find the safety pin. Everything is fine, it's under your sewing machine.
  22. sew down the elastic and close the channel. Give everything a tug and you're finished!
  23. Put them on and see if it all fits. Take a bunch of pictures of yourself:
Discarded doughnut pants...


And there you go, something like harem pants. these are a little poofy and I might not have used silk taffeta for them if iI could think of a better fabric. I might like.. put marbles in them or something to weigh them down but we'll see when they're added onto everything else. I'll post about that later.

Now you know how to make sexy bloomers (if you're into that) or you can wow your friends with homemade pj bottoms for the next gift giving holiday! Due to the nature of faire, I tend to go through two pairs of bloomers a year. (One pair will give out during northern and I'll replace it and the other pair will give out after southern. At least they're staggered.)

I hope this made sense, have fun with that, bitches.

Sunday, February 23, 2014

The Midnight Dress

While it's still labeled as the Midnight Dress, it'll be called Pamina in my head from now on.

Quick Overview

Mid-Polka. "Hop on pop, hop on pop, one fish,
two fish, red fish, blue fish."
Materials:

  • Dark blue poly blend satin
  • dark blue canvas
  • dark blue grosgrain ribbon
  • silver plastic medallion trim
  • white/silver rhinestone bead trim

Total Time:

About a week.

Drinks:

Not much, actually, I tend to not drink on school nights... and this was executed during a school week. So... strawberries and cream tea from adagio teas

Noise:

Dexter.  So much. Dexter. I'm on season 6 now... I was not when I started. Also Thrilling Adventure Hour because yesssssss

Final notes:

The dress went by relatively quickly, between having a simple gathered skirt and not having to fit the bodice for my weirdly short torso this was a faster process. I think this is really my first personal design that's become a dress. (The Gold Belle Gown doesn't really count because someone had designed it for me, my job was translating animation into design and billions of people had already done that.) 

I forgot to get a full body picture close enough to see
the shoulder treatment


I wonder if this is how designers feel when they see their shit finished. The satin was tricky to work with for a couple of reasons, mainly it was somewhat easy to manipulate until it wasn't and deceptively thick. The dress ultimately ended up being a little too big with a wee bit of puckering at the chest where I cut the center front just  a bit too curved (chests don't apparently work that way when corseted-ish.) I'm not sure if the dress being too big was a result of me fitting it incorrectly or me losing weight after the belle dress. I'm hoping it was the latter but I'll still have to take the damn thing in. I was afraid that the trim would be far too costumey and in the end, they sort of did, but that aside, it went over well. Even with a farthingale (a kind of narrow renaissance hoop-skirt-ey thing) underneath the dress, the dress was still a bit too long. I tripped a bit on my hem trying to dance and look down and I managed to slip in my heels once but nothing too heartbreaking. Also why do I keep doing outfits with satin gloves? I can't text in them, I can't hold cold things because the perspiration gets on them and then they're wet and satiney and weird.  But DAMN do they feel cool.
I did solve the high friction problem on my shoes by sticking
duct tape to the soles... I also forgot a nice shawl/coat so nautical utility bag
and Power Plant hoodie it is. I didn't realize how high up my leg was at the time.
Fairy God-Sister and I took a bunch of prom photos


and twirly photos. I love twirly photos.

The satin was great and floaty. When we were headed out to the car we had to head down a few steep sets of stairs but the dress supposedly floated nicely behind me. I never got to really see the dress in action except for the twirly photos which is a bit of a shame considering it's very short lifespan (more on this later.) My original plan for my hair didn't turn out as well as I hoped, but that was easily solved with a quick braided bun. 

And that quickly brings me to my next topic:

An almost foolproof way to get accessories that match your outfit

When it comes to spangly dresses like this one, jewelry can be an issue. Thankfully, I was able to come up with remarkably clever solution. 


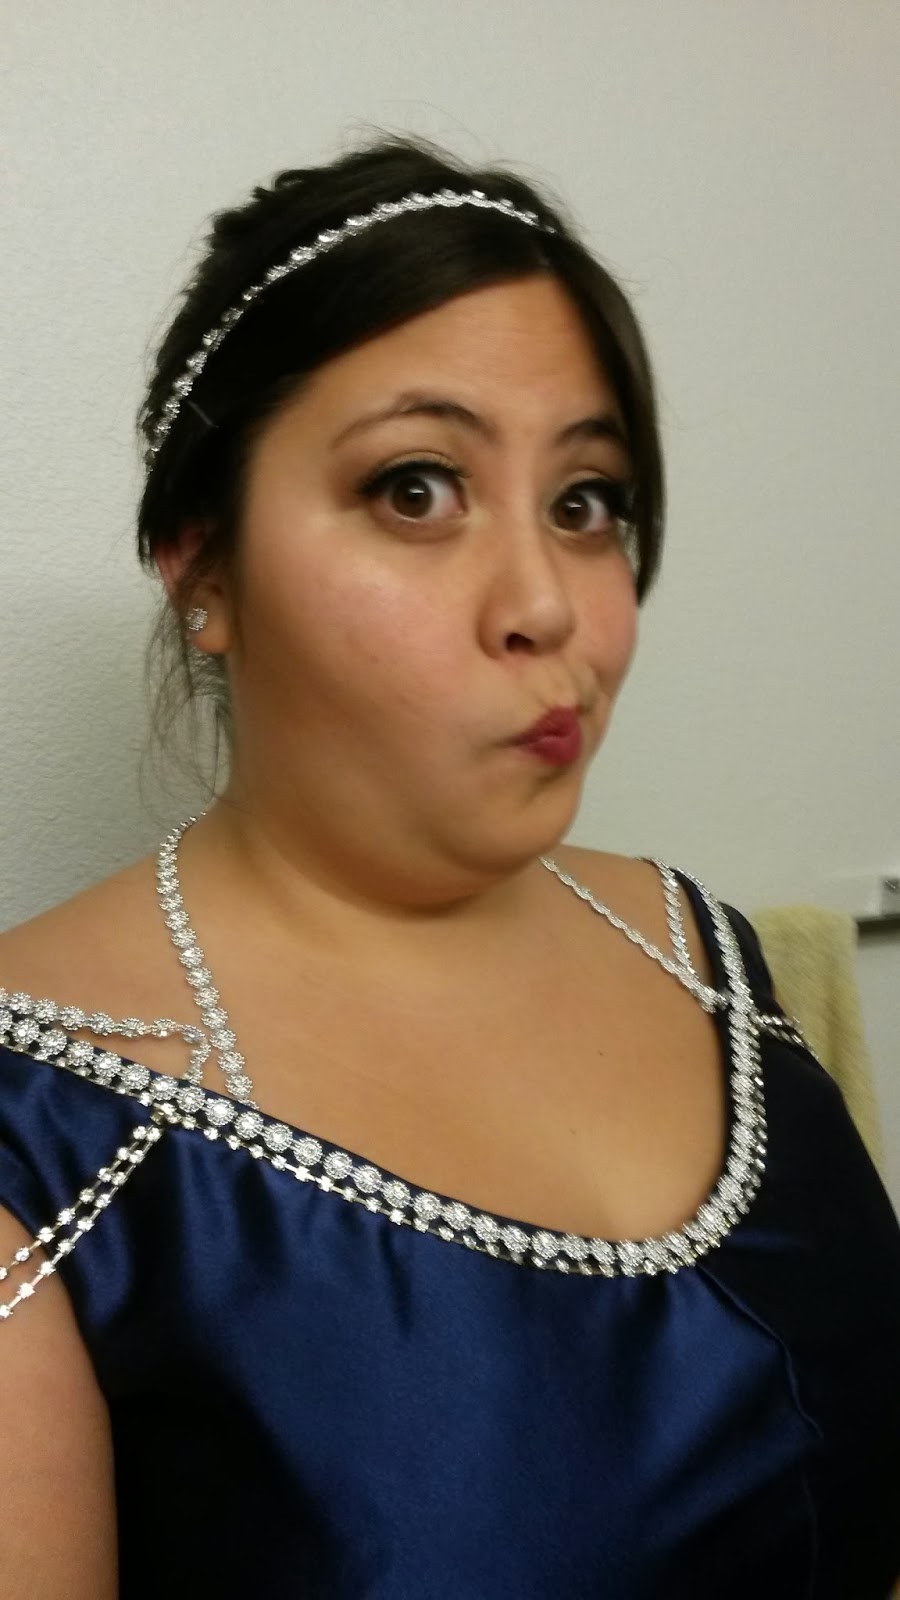
I had a lot of the trim left over after the dress was done and I noticed after cutting it up, I got some pretty nice pieces. So naturally I did what anyone would do... I stuck them all over my face pretending they were dermals. (I don't have picture of this. I should have.)

I did apply a seashell to my face...

Anyway, it occurred to me, I could also just turn them into earrings which was smart considering it was looking a little naked without some jewelry. With the application of some eyelash glue (clear preferably) even you can have perfectly matching accessories.

to be fair, this really only works if you have trim that can be cut up like this.
The stick-ons stayed all night and were actually somewhat uncomfortable to remove, the glue I used was REALLY STICKY. They held up through dancing, sweating, hair-styling and I'm sure, a few satin-gloved swipes to the face and head because I'm a nervous hair-fiddler. The other spare trim got turned into a headband.

I really can't be held responsible for these faces. Although this one
is remarkably similar to that of a friend's trademark adorable/crazyface
Anywhoozle, fun night, pretty simple project. I definitely paid for the simplicity with a somewhat ill-fitting dress but I still feel like a pretty proud mama with my first personal design becoming a real thing... Even if I didn't drape anything. Maybe next time. there are still some designs in a sketchbook, waiting to be done.

there really isn't much better of a feeling than taking a super structured dress
off at the end of the night. 
Next time: the untimely death of the Midnight Dress and a study in alterations.

Friday, February 21, 2014

Home Stretch (The Midnight Dress part III)

I can't tell how long it took but all the machine work is done.

When I last checked in, I had finished both sides of the bodice. Since then, the dress took a trip to school with me for some skirt gathering and surging (with the help of a fairy god-sister.)

 Pretty nice setup for school. The worktables in the Animation Lab are just the right height.

Gathering was simple work. It's very zen to me. I ran two gathering lines about and inch and a half across the top of the skirt and the result was something like a cartridge pleat but with a less uniform drape... which I guess is exactly what it is.

Since one of the fairy god-sisters has a surger, the dress and I took a field trip.


Helloooo sexy
Fairy God-sister working diligently on her own project


I fucking love surging. Everything comes out so neat and clean when you're done and it cuts up the excess and it looks far less likely that I'll run over my own fingers!

I had to run out to get dark blue ribbon for the grosgrain channels. It was such a nice feeling to look at the bodice with matching blue channels sewn with matching blue thread. It was beautiful and comforts my anal-retentiveness like nobody's business

LOOK AT THAT. SO UNIFORM!
While there are no pictures of it, I stitched the front to the lining in a pretty straightforward manner (across the top and bottom and one side) and then flipped it inside out.

Of course after the bodice was finished I had to grommet.

Handwork


I seriously fucking have to think of a better way to close my dresses because I. FUCKING. HATE. GROMMETING.

So I marked the spot and searched for something to poke holes in my dress.

For my friends who want to know what I do with my knives.
So I located my dive knife... which I bought for the thigh-sheath more than anything else... and started stabbing.

Ultimately once the holes were poked, I gave up on the knife and cut X's out with my snips.

Seriously. Fuck this shit.
Forgive my greasy hair. And weird face.


I bashed my thumb a few times. Eugh.


To keep from the dress from getting too poofy I stitched the bodice directly onto the skirt rather than right-sides to right-sides and flipping them around as you would a cartridge pleated skirt. Thank goodness I don't absolutely hate hand sewing.

It's actually quite pretty here.
For now, it's technically done... I mean, it's wearable.


It's a little too large. Damn rat-bones. It'll have to be ladder laced in back.

Next time, SPARKLES!
These cost way too much.

Tuesday, February 18, 2014

Productive in a Way (The Midnight Dress Part II)

I'm considering calling the dress the Queen of the Night dress. Only because I like the idea of naming the dresses after characters from operas.

So with the bodice cut it was very simple to sew the thing together. I'd done it before. There's something very comforting about seeing all that stuff come together nicely.

As usual, I'm somewhat lacking in supplies
I have to run to my car tomorrow to get the rest of the ribbon for the channels but otherwise it's going all according to plan. I'll be trimming the point at the base as I stitch the lining to the satin. I've decided grosgrain ribbons are the best pre-made channels EVER because it just takes, so much more effort out of sewing channels. Simply topstitch. (Yaaaaay fairy god-sister advice!)

Dealing with satin

This doesn't even convey how much fabric

the bodice's pleasant simplicity was frustratingly contrasted by some skirt woes. The satin I picked was frustrating to deal with, if you stuck a pin in the wrong way, the pointy bit would grab the ONE thread in the way of it and just try to pull it out. The whole thing was a bit of a mess. I'm only slightly regretting opting for 8 yards of skirt because I have to hem that shit. Unfortunately, my sewing machine has some problems that I can't quite diagnose because I just don't have the experience to know what the hell is going on down there... So the hour of hemming looked like this (take four shots):

Shit, balls
Crap monkeys
cum dumpster
EXPLETIVE 


It's something about the bobbin. Either way, it was 8 fucking yards and I started running out of curse words.

UUUUUGH
 I'm having concerns over whether I'm going to be able to gather the skirt... unfortunately the only other option I can think of is cartridge pleating and I can't prove it's going to work. I guess we'll find out.

Next time, HOPEFULLY everything but the finishing.


Sunday, February 16, 2014

Ballin' (The Midnight Dress Part 1)

That dress name is subject to change I just don't like it as much.

The nice thing about being back up here in NorCal is that there's a plethora of places for a girl like me to entertain herself on the weekends. Even if she's not into goddamn clubbing and drinking... (Well maybe the second one a bit... but seriously. Fuck clubbing.)

This month, I've found myself doing a lot more ballroom dancing than usual and conveniently, the bay presented some opportunities for some dancing and sewing.

Soooo the dress?

The dress is pretty simple on it's own, it's the same bodice as the Gold Belle dress but with straight front rather than a pointed once. I'm planning on sewing the gathered skirt to the bodice and basically making the whole thing more "commercial" rather than a super elaborate period piece.

simple, yet elegant. Ish...
Ideally I'd like silver and clear rhinestone trim, practically dripping off the shoulders but that shit's expensive and I'm sort of on a college student budget and timeframe. So it's a little costume-ey still. But what ballgown isn't?

Since this is the first time I'm working from my own design, there's gonna be more winging it than I'd like for a dress that I need in 6 days. Thankfully I had a pattern pretty much already made so really the question was, could I get away with my swing dancing saddle shoes under the dress?


Thankfully Ross pulled through in that department and I found some wide, low-heeled shoes that will hopefully suit my purposes.


To line or not to line?

So with the Belle dress, I double lined the bodice and was able to slip the boning in there and avoid the unpleasantness of either making a corset or figuring out how to hide a bra under the gown. This time, due to limited time and materials... I'm trying for only one layer of lining. Fingers crossed

One of the Fairy God-Sisters said it'd work

 And if that doesn't work, I have a bra that's at least the same color. I'm a big believer in undergarments that match your dress.


For now, I have the bodice cut... the satin's just tempting me now. I'm terrified to cut it yet.
here it is... being used as a cover for my dirty laundry. Hey, I had guests over and I was trying to clean.
next time, hopefully, the end of the bodice and the beginning of the skirt.

Wednesday, February 12, 2014

Excuses, Excuses

Another placeholder post:

I am so sorry I haven't been able to update this. School is back with a vengeance. That does not mean I'm not sewing. It means that... well I want to graduate.

So some upcoming things you can all look forward to once I get back on my feet:


  • A midnight blue ballgown
  • An alteration of said blue ballgown to a 50's style swing-dress
  • A Selkie Coat
  • A slip dress made from a bedsheet
  • Some starting research on a pre-muslim Iran (Persian) gown
It may also be time to start setting up a more professional looking costume portfolio. Y'know?