Sometimes, I make shit so I don't have to buy it. And YOU CAN TOO.
I will admit I have a bit of a problem with being crafty. I have a pinterest account where I commit far too much time to pinning DIY stuff. Occasionally I'll go out and get crafty. I will admit it can sometimes get expensive.
I don't know if I mentioned it in the procrastination
Sailor Dress post, but I'm warming to the idea of adding more rockabilly and retro clothes into my wardrobe. One of the basics I've seen at Bettie Page and other stores are scoop-necked cardigans
Unfortunately, these tend to run expensive at stores, much like most retro-looking clothes, which I find somewhat stupid when it comes to fucking cardigans but whatever. Thankfully Target came to my rescue. I found a bunch of cardigans on sale and had the high neck. I felt they were too plain on their own so I decided to embellish one:
 |
| obligatory before |
I chose an applique I had saved from a jean skirt I had in seventh grade because that's what I had lying around. Before I threw out the skirt, I cut the embellishment, figuring I'd need 'em one day. 9 years later, I did.
 |
| cutting away the denim |
After everything was cut away, I hand-stitched the edges of each piece to the collar of the cardigan. I had to chop up the apliqué
BAM. Embellished caradigan
I feel like another blog would make this a DIY with like, step by step instructions on how to customize your cardigan but here on The Stitchin' Bitch, I'll give you the same instructions I followed:
- Find cardigan
- Find things around the house you want to put on cardigan
- put things on cardigan.
TOOOO be fair, DIYs go as far as to tell you how to put the things on your cardigan so here's my guide to putting things on other things:
Fabric applique and other fabric-ey things
If you bought it at a store, chances are, there are instructions to attach your applique on. Usually it's ironing, if you're lazy like me. If you did what I sometimes do and just cut pieces out from old clothes and other fabric pieces, take a needle, take thread, and sort of stitch the pieces down however you see fit. Either in and out uhm... running stitch(?) or whip-stitch... it might be better to whip or invisible hand stitch. If you google it, you'll find plenty of ways to sew things down. This method also works for buttons and beading.
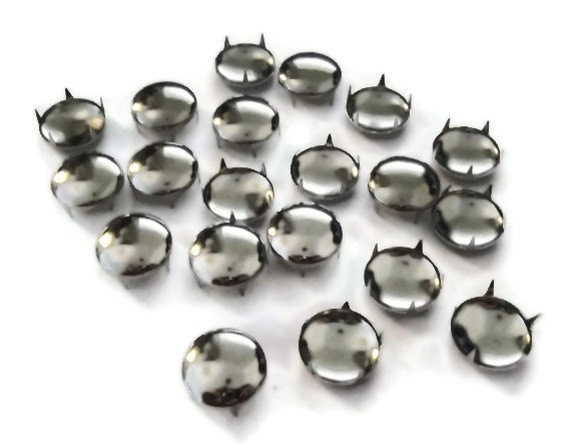
Studs and bedazzley things
If you're like me and can never find your (mom's) bedazzler when you need it, never fear: that shit ain't magic. Seriously, there are little pointy studs on the other end of the bedazzling studs that you just poke through fabric and fold over. BAM 90's jacket. You can bend the ends with a pair of pliers or use your nails.
Pretty much everything else
So things like fur trim, rhinestones, and puff paint and feathers... even buttons and studs, can sometimes just be attached with GLUE. I like fabric glue because it's usually designed for that stuff. I'll also use hot glue if I need to. Hot glue is seriously my best friend when it comes to crafts, it's pretty versatile an hides better than duct tape.
 |
| and the come in fun prints. |
So for those who needed it: there you go, If you're determined, you too can stick stuff to other stuff and make it look like you spent $150 on clothing from Anthropologie.
Here's a link to my Pinterest with a board, specifically called "If They Ask, You Got it at Anthropologie" it's got a lot of other DIY projects including a LOT of cutout tees.
Next time (potentially:) The next big project.