Showing posts with label gift ideas. Show all posts

Saturday, March 8, 2014

Can't Touch This

Lets Talk Panties

When you start making historical costumes, sort of the first thing you wind up doing is having to learn about historical underpants.

in a nutshell
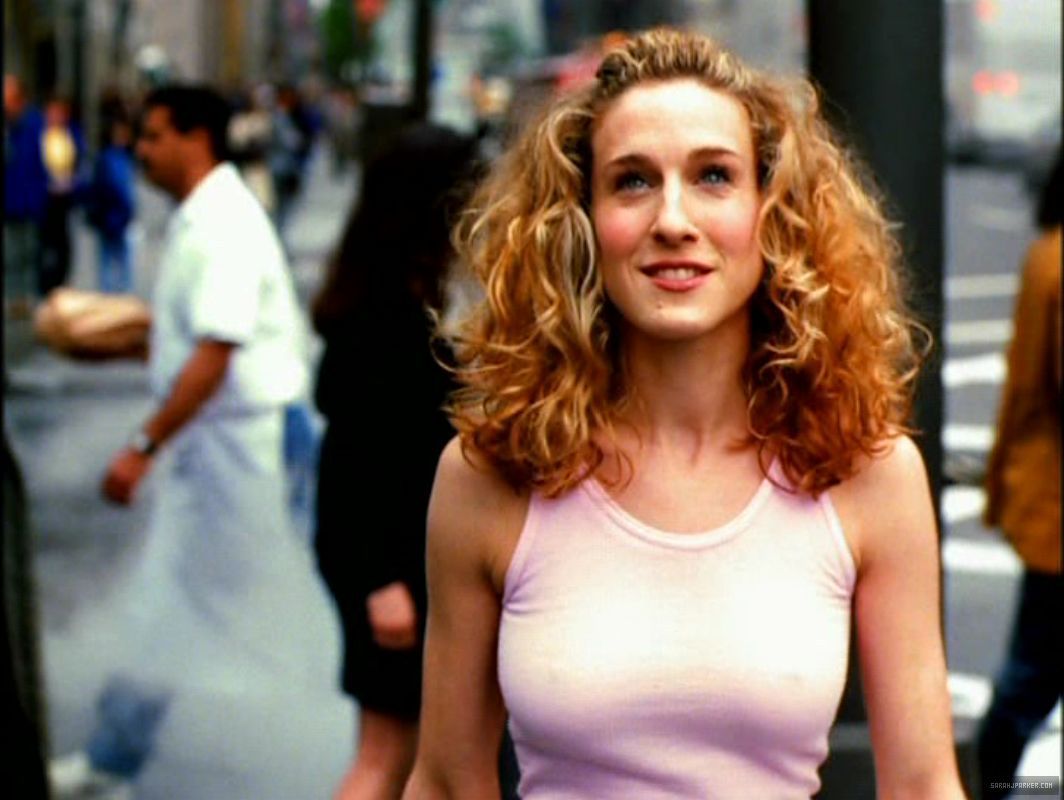
The important thing about underthings is that if you aren't wearing the proper ones, nothing lies properly on top. Just like how sometimes a gal's chest just looks different when she's not wearing a bra under her shirt, she's gonna look weird wearing a bodice without a corset underneath.

I'm looking at you Sarah Jessica Parker. HOW DID YOU GET AWAY WITH IT, DAMNIT?!
This is my subtle plug to DO YOUR RESEARCH. (My peers at school understand how I feel about this) but also, MAKE YOUR UNDERPANTS.

Because we all need to have them under our dresses, every re-enactor costumer and their mother has their way of making bloomers... and usually they're all the same. Look there are only so many ways to make a pair of pajama bottoms. That said, I recently needed to make my own version of... harem pants? something like them genie pants... politically-incorrectly-named-arabian-nights-pants and this seemed like the best way to go.

How to make bloomers/pajama pants/haremish pants/what have you, they're really fucking comfortable


First, you will need:

  • Fabric, I'm about 40 inches from my waist to the floor and I knew I wanted these roomy so I went with about 2 yards of fabric at something like 72" wide. These were for an upcoming costume and possibly clowning or something later so I made mine out of copper striped silk taffeta. I don't recommend silk taffeta for this project.
  • Your sewing machine
  • the appropriate threads
  • Elastic. (mine is 3/4" knit non-roll) I generally prefer non-roll because why not?
  1. Get ready for your endeavor by putting on your favorite comfy pair of pants, you'll be bending around and stuff so you gotta get comfy. Doughnut pattern optional. You can make yourself a drink now if you'd like.
    As usual, take a drink and ignore the mess.
  2. Lay out your fabric (I forgot to take a picture of this)
  3. Realize you don't have a pattern. That's fine, you have your pattern very close to you...
  4. Take off your pants and fold them in half, these are going to be your pattern. What you really need is the curve in the crotch. The curved edge should be pointed out and the straight end will be on the fold.
  5. Mark the curve of the crotch area with a pencil. Mark everything else. The length can be anywhere from your knee to your ankle depending on what you're actually doing. Since these were going to be "harem pants" I ended them at the ankle.
  6. Cut out your pattern twice. You'll wind up with two of this shape:
    Stolen from another DIY for this. You should basically have this shape.
  7. Fire-up your sewing machine and realize you don't have the right thread for this project. Pick out the closest approximation you can.
    Close enough.
  8. Start by hemming the bottom of your pants pieces. You should be making a channel for your elastic band to go around to close the ankle. If you're making pajama bottoms and don't want them closed down there, skip the wide channel and just do a regular rolled hem. Or get yourself a surger. Those things are fucking awesome.
  9. Realize you can't find your fucking snips even though you were using them like, 20 god-damn minutes earlier and you expressly told yourself not to misplace them because you knew you were going to fucking need them in a few minutes. Resort to using your teeth. Then move on to whatever other cutting implement you can find. I suggest nail clippers. Take a drink you Macguyver, you.
    I used sewing shears before resorting to an exact-o knife.
  10. cut your first piece of elastic to the length of your lower calf, or knee or ankle, where you want the end of your pants to rest.
  11. Locate the one safety pin you know you own because you used it to close your cardigan yesterday. Once it's found, resolve to go out and buy more. You'll forget this resolution the next time you get to the fabric store.
  12. attaching the safety pin to one end of the elastic, thread the elastic through your channel making sure not to lose the other end in the channel. If you do, you'll have to pull the elastic out and start over again. Cussing will be involved. Take another drink. As you thread, the fabric should be gathering around the middle of the length of elastic.
  13. Sew the ends of the elastic down at each end of the channel and just save yourself the trouble of trying to do this when you get to sewing the leg together or else you'll repeat step 12 more than you need to. Trust me on this one. I know. This is why there aren't pictures of this step.
  14. Sew the inseam of your pant leg (yes that's what you were working on) up to the curved bit. DO NOT SEW THE CURVED BIT TOGETHER. I used to do this every time I made a pair of bloomers. I still do.
  15. Marvel at the fact that you just made a pant leg and hey it looks like pants! Take pictures of yourself with one pant leg on and realize you can't use them in your blog because you're still technically pantsless and you're not supposed to show up pantsless on the internet. (Unless you choose to in which, more power to ya.)
  16. Repeat steps 8-16 again. Drink twice.
    I stupidly forgot to get pictures of most of these steps so here's something
    I drew earlier...
  17. Dance break. Congratulate yourself on how good of a seamstress you are. Cuss a few times when your bobbin fucks itself over again and threaten to pawn your sewing machine. Take it back when you re-thread it twice and it starts working again.
  18. Flip each leg so that their right side is facing out. This is important because we're gonna sew the crotch.
  19. Sew the curved bits so that they make one BIG smiley face perpendicular to your inseam. The reason you flipped these right-sides out is that for me, anyway, you're sort of coming at it from the waist hole.
  20. Speaking of waist holes, make another channel for the elastic at the waist, leave a little hole for the insertion of elastic.
  21. Cut and thread your elastic again. Have a mild panic attack when you can't find the safety pin. Everything is fine, it's under your sewing machine.
  22. sew down the elastic and close the channel. Give everything a tug and you're finished!
  23. Put them on and see if it all fits. Take a bunch of pictures of yourself:
Discarded doughnut pants...


And there you go, something like harem pants. these are a little poofy and I might not have used silk taffeta for them if iI could think of a better fabric. I might like.. put marbles in them or something to weigh them down but we'll see when they're added onto everything else. I'll post about that later.

Now you know how to make sexy bloomers (if you're into that) or you can wow your friends with homemade pj bottoms for the next gift giving holiday! Due to the nature of faire, I tend to go through two pairs of bloomers a year. (One pair will give out during northern and I'll replace it and the other pair will give out after southern. At least they're staggered.)

I hope this made sense, have fun with that, bitches.

Wednesday, November 13, 2013

I Promise Starbucks Isn't Paying Me: A Red Cup DIY

(although it'd be nice if they did.) and for doing this, not like... being a barrista as a summer job. I did that already.

Well, look at me delivering!

I promised a few DIY gift ideas so here you go:

Before we begin, an intro:

(take a drink, I'm gonna ramble.) I mentioned I LOVE this time of year, when the fog rolls into SF and it's cold and I can wear all these layers and knits that make me look like part hipster, part JC Penny's catalogue. I also like the Red Cup season.... I kind of don't remember what it's all about but it signifies that it will soon be winter and that's happy news for me.
Mmmmm Peppermint Mocha
Starbucks recently came out with a reusable cups that actually look like their paper cups. I'm a HUGE fan of "things that look like other things" especially if they are reusable things that look like fake things and one-time use that look real. (I don't know why.) There's a whole market for stuff like this and for some reason I love the shit out of it. Starbucks had come out with a few reusable cups before that looked somewhat like their paper cups but these were mostly ceramic with silicone covers. Problem is, I don't trust myself traveling with ceramic anything. (I broke a mason jar today while walking through Cost Plus because I didn't want to spend 10 cents at Beverly's.)

So, when they came out in plastic for $1? I ate that shit up and bought about 3 of them. I've always liked seeing the creative ways people draw on Starbucks coffee cups and since that's not within the realm of my design abilities I figured it'd be a good chance to try my and at it.

This weird overlapping busy look
Love it, can't recreate it for some reason.


Yeeeaaah, and then I drew DC characters:


SO TODAY, in an attempt to have a red-cup all year 'round I am going to try and show you a DIY to make yourself a re-usable Starbucks Red Cup. So here goes nothing!

Re-usable Red Cup

Now, you'll find this diy sort of works with any basic "add paper to a thing you want to last a while" so learn and adapt as you will.

You will need:

  • 1 reusable plastic Starbucks cup (this one is a grande 16 oz. I don't know if they make them bigger.)
  • An ex-acto kinfe or any other cutting implement you can find. (I've been known to use a utility knife to cut apart pages for design projects. It really freaked out my professor.)
  • a sponge brush
  • Outdoor Mod Podge.
  • 1 Venti size paper Red Cup

The process:

Step 1: 

a face only a mother could love.

Finish the grande latte you got in a venti cup because you figured if you were going to go to starbucks anyway you might as well get breakfast too. (It's still breakfast if it's 11. Right?) Don't worry about your caffeine intake, the vibrating will help you out with a later step. Then wash the cup out, or else everything gets sticky.

Step 2:


Remove the lip and the bottom of the paper cup. 

this is actually a grande/medium cup because I did this before I realized I needed a bigger one.
You can take a drink because I fucked up. Also ignore the painfully messy desk.
 cut down the side as well to flatten out the paper.


Step 3:

Roll the corner of the paper between your fingers until you can see the layers of cardboard coming apart. Ideally you want to separate the inked red layer from the other three layers.


 Once you've sort of separated the layers, you can peel them apart. Be careful because you do run the risk of ripping the red layer and we're trying to save that shit. The idea is to get the red layer as thin as possible so we can easily manipulate it onto the cup.
Yes, I'm wearing green jeans. What of it?

Step 4:

Wrap your paper around the cup to make sure you did this right and it's all the correct size. The top edge of the paper should be flush with the lower ridge around the top of top of the cup- NOT the lip that the cap locks onto. (It'll stick better if it doesn't have to go over a lot of... level changes.)

Once re-assured you didn't fuck up, take mod podge and apply it liberally to the back of your paper and slap that shit onto the cup. Fold the ends down and trim them with your cutting implement.

and it's MOD podge, none of this "modge podge" shit.


Step 5:

I feel like you guys knew where this was going. Start coating the outside of your cup in mod podge. Get a good layer on there and let it dry. You're going to do this about 5 times.

Wait until the mod podge gets clear before you add the next layer.


Take this time to do your homework. Which also requires you to be on blogger. Look at me being responsible! (That is an analysis of page layout in comic books. It's for one of my DAI intro classes.)


It doesn't really matter what kind of stroke you use to apply the stuff until the end. When you think your'e getting into your last few layers, start using a stabbing- I mean dabbing motion with your brush so you get a more textured look. This is where the whole, vibrating-from-having-too-much-coffee thing helps. You don't HAVE to do this if you like the... woody? Liney texture that the sponge brush gives to mod podged stuff. Since I don't I went this way instead because it was closest to the look of the original plastic cup- which also had that sort of texture to it. 

I think they call it stippling...
Anyway lather, rinse, repeat until you think you have enough layers. Then let it dry until you're comfortable using it. I don't think this is dishwasher safe but I don't have a dishwasher so that's not a problem for me. Now everything in my bedroom smells like mod podge but I kind of couldn't care less... probably the fumes talking.


In-de-fucking-stinguishable. At least, not from far away.

You can do this with magazine cutouts that you want to apply to a cup or scrap booking paper- you can peel it apart like I did this cup if it's too thick... or just get the thin stuff. That process is a little trickier because you might need a template for the outside of the cup... Maybe I'll tutorial that later.

I really hope this was understandable as this was my first... full-assed tutorial. Let me know if someone else tries this DIY.

And spare tidbit, I guess. My current favorite drink is a soy (I'm lactose intolerant,) sugar-free (if I can get it) cinnamon dolce latte. Except I keep forgetting I like cinnamon dolce because I don't like cinnamon candy. For the times I'll forget I will usually get a peppermint mocha (also soy) but usually it's just a plain soy latte because most places I go use vanilla soy milk which is pretty sweet already. It's also fucking expensive to not be able to process lactose... Soy milk is like, 50 cents more in some places! That shit adds up!

Oh, the tutorial's over. I don't know why you're still reading this. Enjoy.