Sunday, February 16, 2014

Ballin' (The Midnight Dress Part 1)

That dress name is subject to change I just don't like it as much.

The nice thing about being back up here in NorCal is that there's a plethora of places for a girl like me to entertain herself on the weekends. Even if she's not into goddamn clubbing and drinking... (Well maybe the second one a bit... but seriously. Fuck clubbing.)

This month, I've found myself doing a lot more ballroom dancing than usual and conveniently, the bay presented some opportunities for some dancing and sewing.

Soooo the dress?

The dress is pretty simple on it's own, it's the same bodice as the Gold Belle dress but with straight front rather than a pointed once. I'm planning on sewing the gathered skirt to the bodice and basically making the whole thing more "commercial" rather than a super elaborate period piece.

simple, yet elegant. Ish...
Ideally I'd like silver and clear rhinestone trim, practically dripping off the shoulders but that shit's expensive and I'm sort of on a college student budget and timeframe. So it's a little costume-ey still. But what ballgown isn't?

Since this is the first time I'm working from my own design, there's gonna be more winging it than I'd like for a dress that I need in 6 days. Thankfully I had a pattern pretty much already made so really the question was, could I get away with my swing dancing saddle shoes under the dress?


Thankfully Ross pulled through in that department and I found some wide, low-heeled shoes that will hopefully suit my purposes.


To line or not to line?

So with the Belle dress, I double lined the bodice and was able to slip the boning in there and avoid the unpleasantness of either making a corset or figuring out how to hide a bra under the gown. This time, due to limited time and materials... I'm trying for only one layer of lining. Fingers crossed

One of the Fairy God-Sisters said it'd work

 And if that doesn't work, I have a bra that's at least the same color. I'm a big believer in undergarments that match your dress.


For now, I have the bodice cut... the satin's just tempting me now. I'm terrified to cut it yet.
here it is... being used as a cover for my dirty laundry. Hey, I had guests over and I was trying to clean.
next time, hopefully, the end of the bodice and the beginning of the skirt.

Wednesday, February 12, 2014

Excuses, Excuses

Another placeholder post:

I am so sorry I haven't been able to update this. School is back with a vengeance. That does not mean I'm not sewing. It means that... well I want to graduate.

So some upcoming things you can all look forward to once I get back on my feet:


  • A midnight blue ballgown
  • An alteration of said blue ballgown to a 50's style swing-dress
  • A Selkie Coat
  • A slip dress made from a bedsheet
  • Some starting research on a pre-muslim Iran (Persian) gown
It may also be time to start setting up a more professional looking costume portfolio. Y'know?

Thursday, January 2, 2014

Happy New Year, I'm Not Dead.

Just... look at the title. Happy New Year, from the Stitchin' Bitch. I'm not dead! Things are coming! Unfortunately, another year is passed and I totally forgot to finish the goddamn new years eve dress that I've been planning. (it's a thing. One day you might learn about it.) I'm still regrouping and figuring out what to do next... in the meantime here's a filler project for any of you that might still have belated holiday gifts to give out:

So, by request:

DIY Tea Bags!

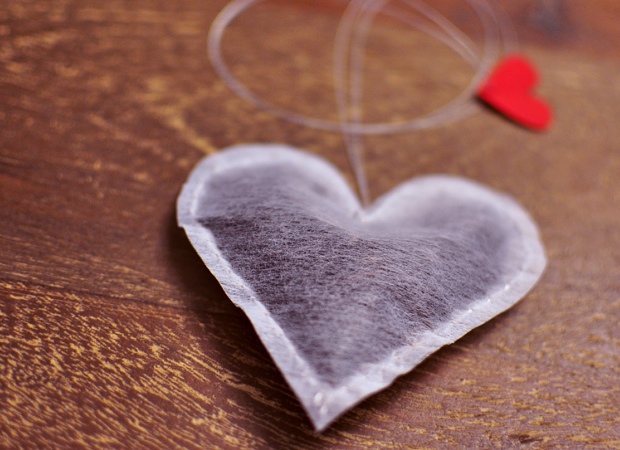
I wish I had an artsier picture so here's the one I stole from the site that gave me the idea:
mine looks vaguely similar


For this project you will need:

sewing shears... because that's what I had.

  • loose leaf tea
  • coffee filters
  • needle
  • undyed thread (I just prefer un-dyed just in case the dye they use is bad for you.)
  • scissors

How to do it:

  1. Gather your materials in a dry place- I got about 15 coffee filters wet doing this project because I was too lazy to clean up earlier. Now I have about 15 unusable coffee filters. Thankfully these are sort of cheap.
  2. Flatten out two coffee filters on top of each other. Sort of rub it around until they are flat... nothing fancy.

    nice and flat
  3. Cut out your shape. I chose hearts and made an attempt at a skull. Anything symmetrical works out well because... less cutting...
    You'll notice I'm doing stuff with one hand, that's because I'm using a camera phone. Only the highest in production value for you guys
  4. Grab your needle and thread. I use a running stitch- up, down, up down (pause to giggle for sex jokes) for those of you unaccustomed to the names of things- to go around the edges of the bag. Only go about halfway, you need a space to add the tea.

    this is how I speed up the process, fold and poke. 
     
  5. Get a scoop, add the tea. It helps to compare the amount of tea you use to a commercial tea bag. Just remember that tea leaves need to... unfurl fully within the bag get into the water so don't pack it too tightly.
    Earl Blue, it's a  thing, apparently. It pretty much tastes
    like Earl Grey
    one handed.

     6.  Once you're finished filling, finish sewing it up. You can knot it however you want.


There you go, one skull... ish and a heart.
And that's about it. Tea bags, in any shape you'd like. They make great gifts and are faster to make the longer you do them. I'm looking into a faster way to seal them but as it is, this method works pretty well for me, it's just time consuming. It took me about 30 minutes to make 5.

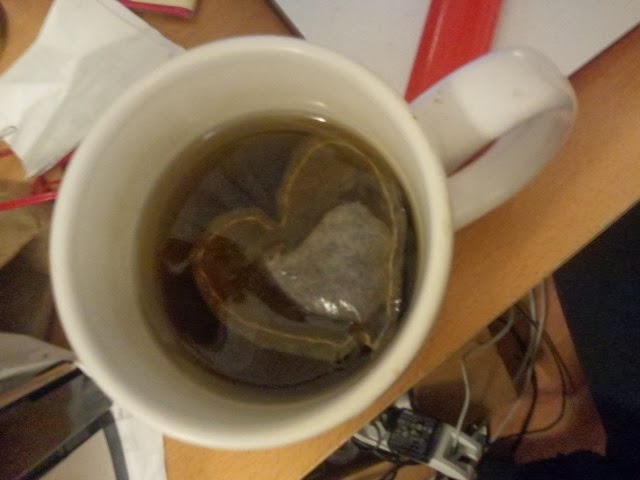
What it looks like in cup. Kind of sweet, like a hug.


So there you go, enjoy your tea bagging... wow this post is less, curse-word-ridden and more sexual innuendo-ey.

All hipstered out (for finals week)
Mug courtesy of a fairy-god-sibling. And the Bloggess
Happy Fucking 2014, Bitches.

Thursday, November 28, 2013

The Holiday Wishlist Project!

To those who celebrate it, happy Thanksgiving. If you'd like to know, in addition to my education, health, family, and my beloved friends, I'm thankful for:

  • swear words
  • strong drinks
  • tea
  • floaty, poofy and flattering dresses


So now that Thanksgiving is over and we've all discussed what we're thankful for, lets start thinking about the stuff we want... and... want to... give back...

Presenting the 2013 Holiday Wishlist Project!!!

So here's the lowdown: 

A few years ago- probably around 2009 as I was poking around DeviantArt, an artist I followed came up with this project. Here's how it goes:

The Basics:

You write a wish list, other people write wish lists. You peruse their wish lists and see if you can grant any of theirs, and others do the same. It's about making someone's holiday a little brighter, not OMFG GIVE ME PRESENTS. It's a nice feeling to give to others and grant their wishes, y'know?

Step 1:

Write a Christmas/Holiday wish list of 10 things. It can be any 10 wishes you'd like to have granted, no matter what they are, possible or impossible. They can be simple and fun (I'd love a drawing of my favorite fandom pairing) to medium (I would like a copy of Inglorious Basterds) to big and over the top (I want a new house/computer/mini motorbike) to kind of technically un-grantable. (I want to ace all my classes this semester) Just things that you truly wish for this holiday season.

Post that list on the Holiday Wish List Event Page.

Step 2

Poke around on the event page to see what other people have wished for, and here's where the magic happens: if you see a wish that you can grant, do so and make someone's wish come true! Perhaps you have an old leather jacket that you don't want anymore or a gift certificate you don't use- or who knows? Maybe your cat just had kittens and someone needs a furry new companion! Are you an expert at Physics and someone wished for a good grade in PHYS 101? Why don't you offer your hand at tutoring?

Remember, the key to this project is not to put people out, it's just a chance to help people who you might not have known you could have helped in the first place. Gifts can even be made anonymously if you'd like.

---

And that's about it. There are no real rules, no guarantees, and no strings attached. Just wish and send it out and maybe it'll come true. Give and you might receive and you'll get the joy of knowing you made someone's holiday special!

And if you'd like to know: 

My holiday wish list:
  1. To pass all my classes this semester.
  2. time and inspiration for more sewing projects
  3. to learn to drape
  4. a skateboard and lessons on how to use it... (I don't know why, I've just always wanted to learn)
  5. a motorcycle and lessons on how to use it. (Don't judge. I really want to know.)
  6. a record player.
  7. stage fighting lessons or real sword training. (I'm a fast learner and a lot of people have shown me basics, I'd really like to learn more.)
  8. tons of holiday parties and just generally more time with friends and opportunities to dress up
  9. A banjo... and maybe lessons.
  10. A mistletoe kiss. (traditional at this point)
the project event page is linked here so if you for some reason are reading this and aren't my friend on facebook: here you go!

 Holiday wish list Project

Wednesday, November 20, 2013

Shameless Self Promotion

This is my blog, I'll do what I want with it:

Just a little spreading of the word in case someone stumbles across this little blog and finds me so profoundly interesting they want a chance to see me in action, Serenata (the singing group I'm in) is having a winter CD release party!


So there you have it a free concert, pretty ladies, amazing costumes, beautiful music, maybe a little reception afterwards?

I hope to see you there <3

Wednesday, November 13, 2013

I Promise Starbucks Isn't Paying Me: A Red Cup DIY

(although it'd be nice if they did.) and for doing this, not like... being a barrista as a summer job. I did that already.

Well, look at me delivering!

I promised a few DIY gift ideas so here you go:

Before we begin, an intro:

(take a drink, I'm gonna ramble.) I mentioned I LOVE this time of year, when the fog rolls into SF and it's cold and I can wear all these layers and knits that make me look like part hipster, part JC Penny's catalogue. I also like the Red Cup season.... I kind of don't remember what it's all about but it signifies that it will soon be winter and that's happy news for me.
Mmmmm Peppermint Mocha
Starbucks recently came out with a reusable cups that actually look like their paper cups. I'm a HUGE fan of "things that look like other things" especially if they are reusable things that look like fake things and one-time use that look real. (I don't know why.) There's a whole market for stuff like this and for some reason I love the shit out of it. Starbucks had come out with a few reusable cups before that looked somewhat like their paper cups but these were mostly ceramic with silicone covers. Problem is, I don't trust myself traveling with ceramic anything. (I broke a mason jar today while walking through Cost Plus because I didn't want to spend 10 cents at Beverly's.)

So, when they came out in plastic for $1? I ate that shit up and bought about 3 of them. I've always liked seeing the creative ways people draw on Starbucks coffee cups and since that's not within the realm of my design abilities I figured it'd be a good chance to try my and at it.

This weird overlapping busy look
Love it, can't recreate it for some reason.


Yeeeaaah, and then I drew DC characters:


SO TODAY, in an attempt to have a red-cup all year 'round I am going to try and show you a DIY to make yourself a re-usable Starbucks Red Cup. So here goes nothing!

Re-usable Red Cup

Now, you'll find this diy sort of works with any basic "add paper to a thing you want to last a while" so learn and adapt as you will.

You will need:

  • 1 reusable plastic Starbucks cup (this one is a grande 16 oz. I don't know if they make them bigger.)
  • An ex-acto kinfe or any other cutting implement you can find. (I've been known to use a utility knife to cut apart pages for design projects. It really freaked out my professor.)
  • a sponge brush
  • Outdoor Mod Podge.
  • 1 Venti size paper Red Cup

The process:

Step 1: 

a face only a mother could love.

Finish the grande latte you got in a venti cup because you figured if you were going to go to starbucks anyway you might as well get breakfast too. (It's still breakfast if it's 11. Right?) Don't worry about your caffeine intake, the vibrating will help you out with a later step. Then wash the cup out, or else everything gets sticky.

Step 2:


Remove the lip and the bottom of the paper cup. 

this is actually a grande/medium cup because I did this before I realized I needed a bigger one.
You can take a drink because I fucked up. Also ignore the painfully messy desk.
 cut down the side as well to flatten out the paper.


Step 3:

Roll the corner of the paper between your fingers until you can see the layers of cardboard coming apart. Ideally you want to separate the inked red layer from the other three layers.


 Once you've sort of separated the layers, you can peel them apart. Be careful because you do run the risk of ripping the red layer and we're trying to save that shit. The idea is to get the red layer as thin as possible so we can easily manipulate it onto the cup.
Yes, I'm wearing green jeans. What of it?

Step 4:

Wrap your paper around the cup to make sure you did this right and it's all the correct size. The top edge of the paper should be flush with the lower ridge around the top of top of the cup- NOT the lip that the cap locks onto. (It'll stick better if it doesn't have to go over a lot of... level changes.)

Once re-assured you didn't fuck up, take mod podge and apply it liberally to the back of your paper and slap that shit onto the cup. Fold the ends down and trim them with your cutting implement.

and it's MOD podge, none of this "modge podge" shit.


Step 5:

I feel like you guys knew where this was going. Start coating the outside of your cup in mod podge. Get a good layer on there and let it dry. You're going to do this about 5 times.

Wait until the mod podge gets clear before you add the next layer.


Take this time to do your homework. Which also requires you to be on blogger. Look at me being responsible! (That is an analysis of page layout in comic books. It's for one of my DAI intro classes.)


It doesn't really matter what kind of stroke you use to apply the stuff until the end. When you think your'e getting into your last few layers, start using a stabbing- I mean dabbing motion with your brush so you get a more textured look. This is where the whole, vibrating-from-having-too-much-coffee thing helps. You don't HAVE to do this if you like the... woody? Liney texture that the sponge brush gives to mod podged stuff. Since I don't I went this way instead because it was closest to the look of the original plastic cup- which also had that sort of texture to it. 

I think they call it stippling...
Anyway lather, rinse, repeat until you think you have enough layers. Then let it dry until you're comfortable using it. I don't think this is dishwasher safe but I don't have a dishwasher so that's not a problem for me. Now everything in my bedroom smells like mod podge but I kind of couldn't care less... probably the fumes talking.


In-de-fucking-stinguishable. At least, not from far away.

You can do this with magazine cutouts that you want to apply to a cup or scrap booking paper- you can peel it apart like I did this cup if it's too thick... or just get the thin stuff. That process is a little trickier because you might need a template for the outside of the cup... Maybe I'll tutorial that later.

I really hope this was understandable as this was my first... full-assed tutorial. Let me know if someone else tries this DIY.

And spare tidbit, I guess. My current favorite drink is a soy (I'm lactose intolerant,) sugar-free (if I can get it) cinnamon dolce latte. Except I keep forgetting I like cinnamon dolce because I don't like cinnamon candy. For the times I'll forget I will usually get a peppermint mocha (also soy) but usually it's just a plain soy latte because most places I go use vanilla soy milk which is pretty sweet already. It's also fucking expensive to not be able to process lactose... Soy milk is like, 50 cents more in some places! That shit adds up!

Oh, the tutorial's over. I don't know why you're still reading this. Enjoy.

Sunday, November 10, 2013

A Most Wonderful Time

For those of you who don't like filler posts, maybe just skip to the bottom where I'll have an update on what's to come. Everything from here is wind up. 

Start skipping


So usually, my favorite time of year is from the week before Thanksgiving, through to New Years. This is because of a few things: 
  1. I feel like it's the only time it's okay to hear Christmas carols on the radio 
  2. the weather in SoCal is cold enough for layering and the weather in NorCal gets gray and/or rainy. 
  3. I get to buy/make things for people.
  4. I get to spend a lot of time at home
  5. Starbucks Red Cup season. I just like the cups.
  6. Increased parties/excuses to have parties... the nice kind.
I feel like that's enough reasons, right?

Anyway, for some reason, the feeling's come early this year so I'm starting some holiday planning early as well. You know, before finals really kick in.

From Christmastime last year. My first Christmas tree ( Before you get sad, you should know: I'm jewish)


Unfortunately, due to school and just difficult scheduling, I won't be able to participate in Dickens Fair this year.  For those of you who don't know what Dickens Fair is, it's like Renaissance Faire, but in Victorian London and there are book characters from the works of Charles Dickens running around. It's REALLY fucking awesome.

Click it. Cliiiiiiick iiiiit.


I play the cheapest kind of whore. Not even joking.
credit: Richard Lowe Jr


Stop skipping/The point


So what can you expect to see here, now that we're in my favorite time of year? (seriously, hold me to this because studies have shown just announcing stuff like this gives us the positive feedback we need to keep us from needing to fulfill things we've planned, like new years resolutions.)

  • A holiday dress project
  • some diy holiday present ideas. For those of us who like to pretend that making things is cheaper than buying them.
  • Happy ______ posts for assorted holidays
  • An announcement of Serenata's winter CD and release party
  • The return of the Holiday Wishlist Project (I'll explain when it happens)
  • MAYBE a victorian corset project.
  • A post about a fail.
So stay tuned!